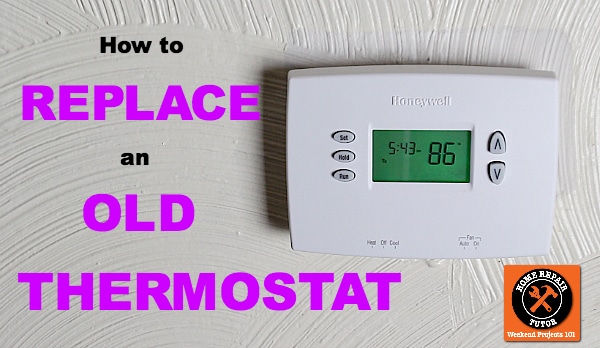
How To Change A Home Thermostat

Ever stare at your old thermostat, silently wishing it understood your chilly mornings or sweltering afternoons? Maybe it’s just… beige. And boring. And frankly, a little bit bossy, refusing to cooperate with your comfort dreams. Well, guess what? It’s time to take back control! And no, you don't need an engineering degree or a hotline to a professional to do it. You, my friend, are about to embark on a surprisingly delightful journey into the world of home climate command!
Changing your home thermostat might sound like a daunting task, full of intimidating wires and technical jargon. But I'm here to tell you, it's actually one of the most empowering, budget-friendly, and frankly, fun DIY projects you can tackle. Seriously! Think about it: a little bit of effort now can lead to a lifetime of perfectly tailored temperatures, lower energy bills, and a satisfying sense of accomplishment. Who doesn't want that?
Why Bother, You Ask?
Oh, let me count the ways! First, there's the obvious: comfort. Imagine walking into a perfectly cooled home after a scorching summer day, or snuggling into warmth on a frosty winter evening, all thanks to a thermostat you programmed yourself. Pure bliss, right?
Must Read
Then there's the magic of modern technology. New thermostats, especially the smart ones, can learn your habits, connect to your phone, and even tell you how much energy you're saving. They look sleeker, they're smarter, and honestly, they just make your home feel more… you. Plus, that old, yellowing plastic box from the 90s? It's probably costing you more in wasted energy than you think!
The Great Unveiling: Preparation is Key!
Before we dive into the nitty-gritty, let's make sure you're ready. This isn't rocket science, but a little prep goes a long way. First things first, and this is super important: turn off the power to your HVAC system! Head to your circuit breaker panel (usually in the basement, garage, or a utility closet) and find the breaker labeled "HVAC," "Furnace," or "AC." Flip that switch. Trust me, a little caution now saves a lot of headaches (and potential shocks!) later. Safety first, always!

Next, gather your tools. You won't need much: a screwdriver (usually Phillips, maybe flathead), some masking tape, a pen or marker, and possibly a phone or camera. That's it! See? Already feeling like a pro, aren't you?
Out with the Old, In with… the Photo Op!
Now, stand proudly before your current thermostat. Give it a fond farewell, or a stern look, whichever feels right. Most thermostats have two parts: the faceplate and the sub-base that's screwed into the wall. Gently pry off the faceplate. Sometimes it snaps, sometimes it slides up, sometimes there's a tiny screw. Don't force it!
Once the faceplate is off, you'll see a glorious tangle of wires connected to terminals. DO NOT UNHOOK ANYTHING YET! This is where your phone camera comes in handy. Take a clear, well-lit photo of how every single wire is connected to its labeled terminal. Seriously, take multiple photos from different angles. This picture is your treasure map, your cheat sheet, your best friend in this entire process. You’ll thank yourself later!

Wire Wonders: Understanding the Rainbow (or Lack Thereof)
Now, grab your masking tape and pen. One wire at a time, disconnect it from its terminal. As you do, immediately wrap a small piece of tape around the wire and label it with the letter of the terminal it came from (e.g., "R," "W," "Y," "G," "C"). Why? Because wires aren't always color-coded perfectly, and those labels are your lifeline when connecting the new thermostat. Don't skip this step!
Once all the wires are labeled and disconnected, unscrew the old thermostat's sub-base from the wall. Gently pull it away, making sure the wires don't disappear back into the wall (a little bending of the wires can help them stay out).

The Grand Installation: Your New Command Center!
Time for the exciting part! Unpack your shiny new thermostat. Read its instructions, even if you feel like you've got this handled. Every model is a little different. Usually, you'll mount its new sub-base to the wall using the provided screws and anchors (if needed).
Then, refer to your photos and your carefully labeled wires. Connect each wire to the corresponding terminal on your new thermostat's sub-base. Match "R" to "R," "W" to "W," and so on. If your new thermostat has fewer terminals than your old one had wires, consult its manual—some wires might not be needed for simpler systems, or they might have different designations. This is where your instructions are your best guide!
Once all the wires are securely connected (give them a gentle tug to ensure they're seated), snap the new thermostat's faceplate onto its sub-base. Feel that click? That's the sound of victory!
Power Up and Pat Yourself on the Back!
Head back to your circuit breaker panel and flip that HVAC power switch back on. Go back to your new thermostat. It should light up and prompt you for initial setup (language, system type, etc.). Follow the on-screen instructions. Then, test both your heating and cooling functions. Give it a minute or two for the system to respond. Does it kick on? Is air coming out? Congratulations, you've done it!
Seriously, take a moment to admire your handiwork. You just upgraded your home, potentially saved money, and empowered yourself with a new skill. How cool is that?
This little project isn't just about changing a device; it's about realizing your own capability. It’s about understanding that many "complicated" home tasks are totally within your reach, armed with a little instruction, patience, and a can-do attitude. So, what's next? A smart light switch? A new faucet? The world of DIY is yours to explore, and trust me, it makes life a whole lot more fun. Go forth and conquer your comfort, one project at a time!