How Do You Read A Micrometer

Have you ever looked at something perfectly engineered – a tiny watch gear, a precisely machined engine part, or even just the consistent thickness of your smartphone – and wondered, "How do they make things so exact?" It’s a fascinating question, and often, the answer involves a surprisingly elegant little tool called a micrometer. Learning how to read one might sound a bit technical, but trust me, it’s not only incredibly practical but also a really fun way to dive into the world of precision and truly appreciate the hidden details all around us.
So, what exactly is a micrometer? Imagine a ruler, but one that can measure things with incredible accuracy – often down to a thousandth of an inch (0.001") or a hundredth of a millimeter (0.01 mm)! Its primary purpose is to measure very small external or internal dimensions, such as thickness, diameter, or depth, far more precisely than a standard ruler or even a caliper. The benefits are immense, especially in fields where exact measurements are paramount for safety, functionality, and quality control. Think about an aircraft engine component: a tiny deviation could have massive consequences. For us hobbyists or curious minds, it’s about understanding the tolerances, ensuring parts fit perfectly, or simply satisfying that itch to know just how thick that piece of paper really is.
Where might you encounter this precise gadget? In education, micrometers are staples in shop classes, engineering labs, and even some advanced science courses where students might measure the gauge of a wire, the diameter of a ball bearing, or the thickness of various materials. Beyond the classroom, they pop up in a surprising number of daily life scenarios and hobbies. Mechanics use them constantly to check crankshaft journals, measure valve stem wear, or ensure cylinder bore tolerances. Woodworkers might use them to measure veneer thickness or ensure a precise fit for joinery. Jewelers rely on them for wire gauges and gem settings. Even if you're just a curious DIY enthusiast, having a micrometer can elevate your projects from "good enough" to "perfectly precise." It’s about empowering you to measure with confidence.
Must Read
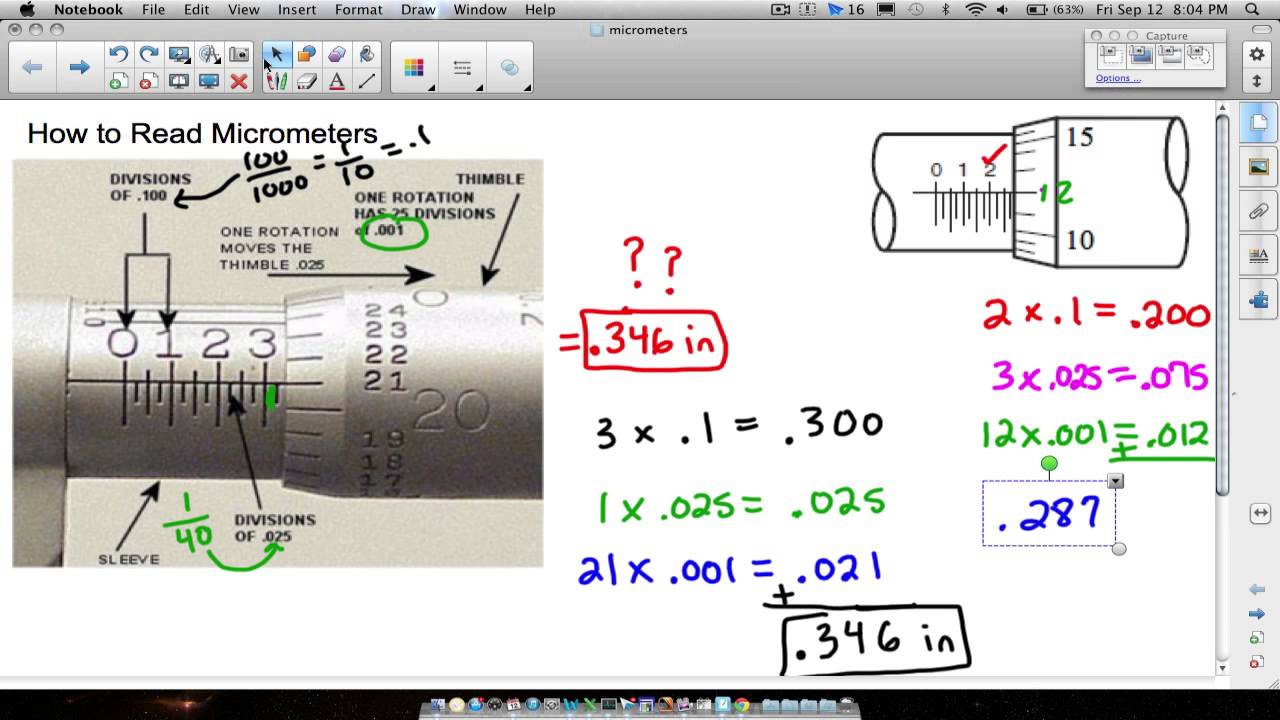
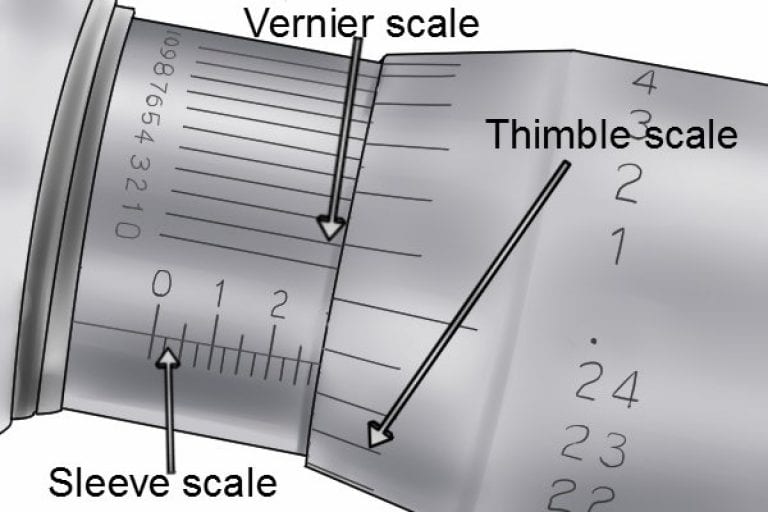
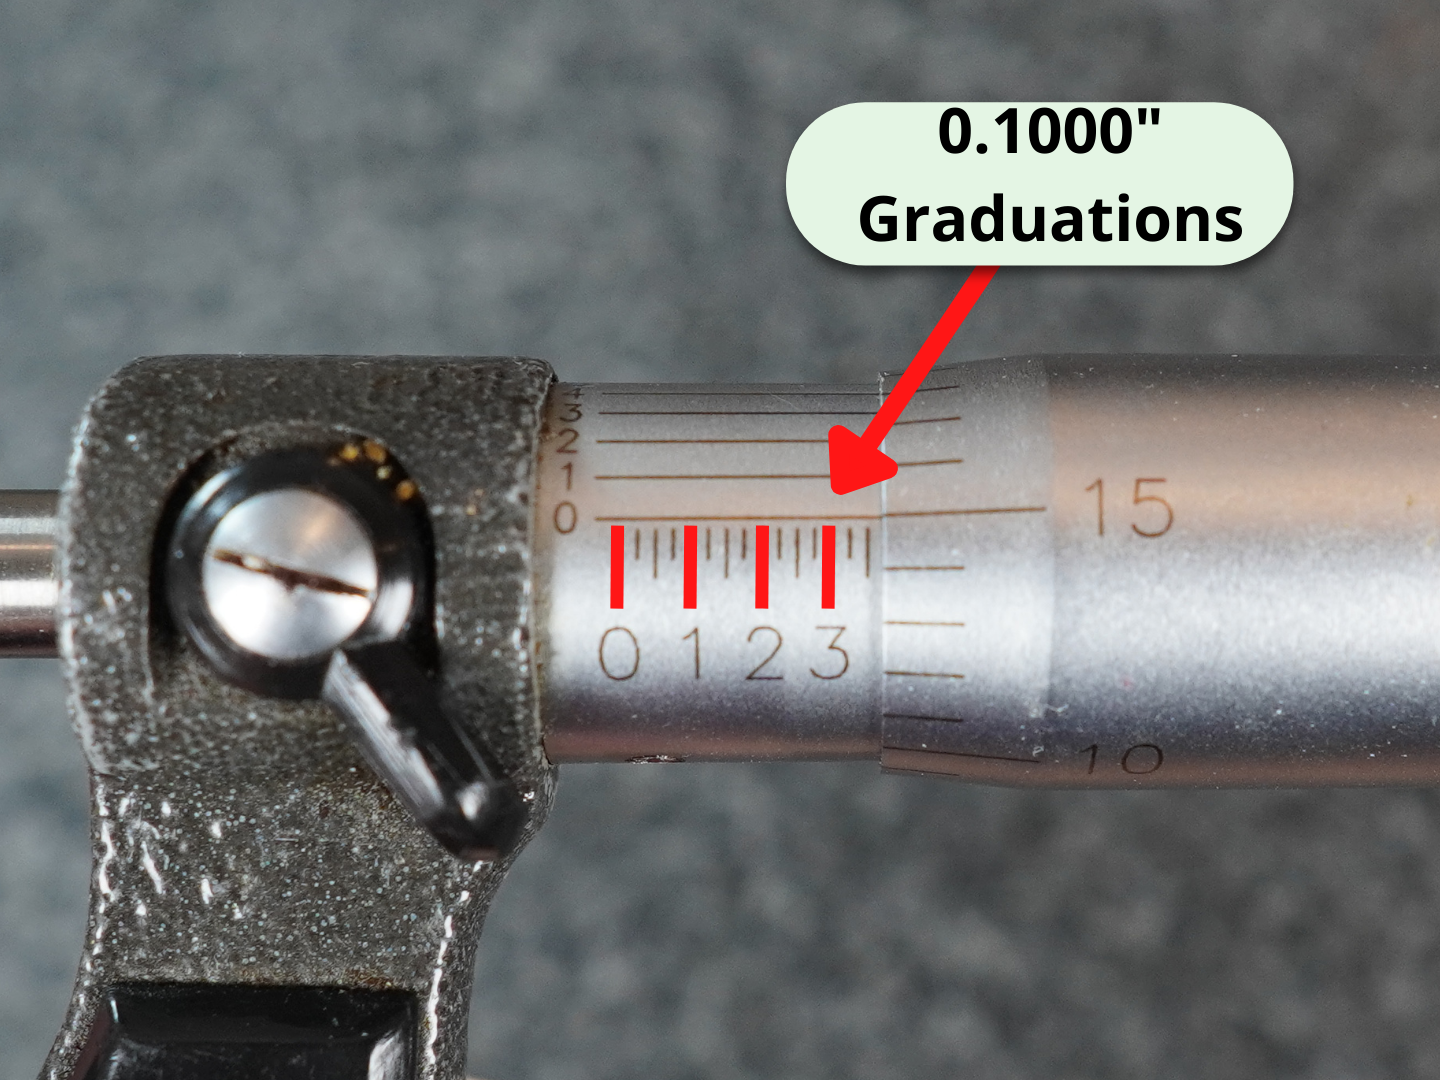
Ready to give it a try? Exploring a micrometer is simpler than you might think. First, try to get your hands on one – many hardware stores sell inexpensive models, or perhaps a friend with a workshop has one you can borrow. You'll quickly identify the main components: the frame, anvil, spindle, the sleeve (with its main scale), and the thimble (the rotating part with the finer scale), often with a ratchet stop. The trick is to combine the reading from the sleeve with the reading from the thimble where it aligns with the datum line on the sleeve. A crucial first step is always checking the zero point: close the micrometer carefully until the ratchet clicks, and ensure it reads zero. Then, pick an everyday object – a coin, a piece of cardstock, or even your fingernail – and practice measuring. With a little patience, you'll soon be unlocking the world of precise measurements and appreciating the subtle engineering all around you, which is surprisingly rewarding!