How Do I Allow Push Notifications On My Iphone
Let's face it, our iPhones are practically glued to our hands these days. And a big part of that connection is those little bursts of information – push notifications! They're those helpful (or sometimes distracting!) alerts that pop up, letting you know about a new text, a breaking news story, or that your favorite game is ready to play. Getting them set up properly can make your iPhone experience so much smoother and more enjoyable. So, let's dive into how to make sure you're getting the notifications you want!
Why bother with push notifications? Well, for beginners, they're a lifeline. Imagine missing an important appointment because you didn't realize your calendar app was trying to remind you. Or for families, push notifications can be essential for staying connected. Think about receiving instant alerts from a shared family calendar or getting a notification when your child arrives safely at school using a location-sharing app. And for hobbyists – let's say you're a keen photographer – push notifications from your favorite photography app can alert you to new editing tutorials or special deals on equipment. They keep you in the loop!
The great thing about push notifications is their versatility. You can customize them to suit your needs. For example, you can choose to receive banner notifications that disappear after a few seconds, or persistent alerts that stay on your screen until you dismiss them. You can also choose to have sounds play with certain notifications, making sure you never miss the important ones. Some apps even allow you to set different notification preferences for different types of alerts. Think of it as your personalized information stream!
Must Read
Okay, so how do you actually allow push notifications on your iPhone? It's surprisingly simple. Here's a quick guide:
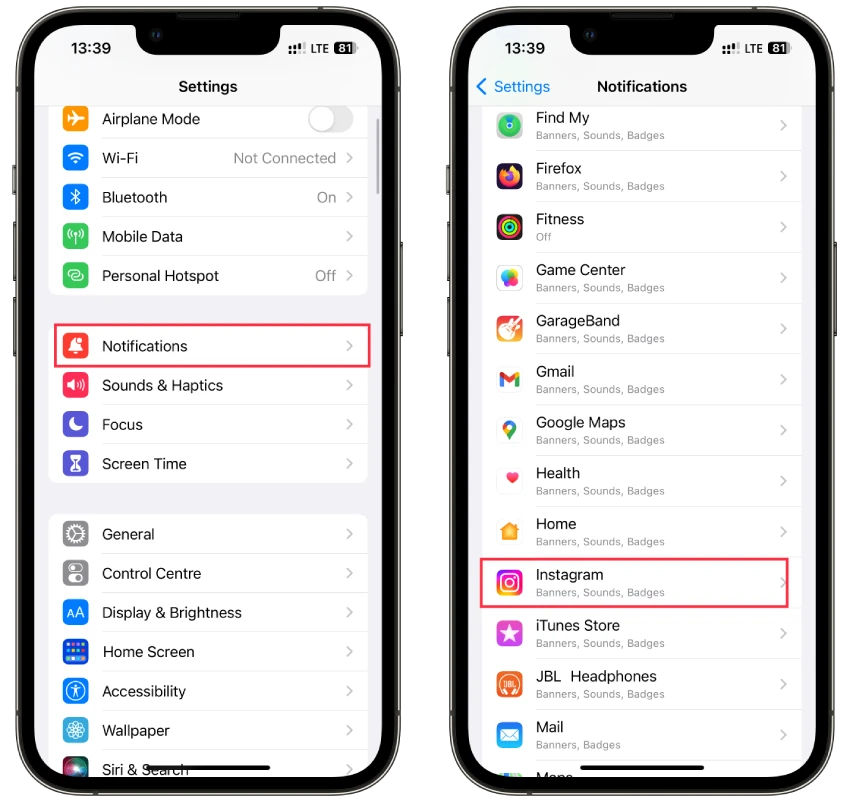
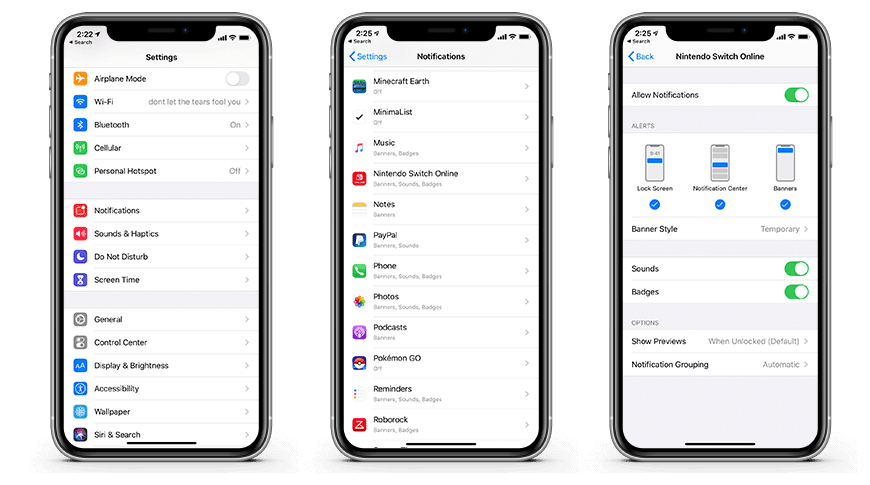
- First, head to your iPhone's Settings app. It's usually represented by a grey gear icon.
- Scroll down and tap on "Notifications." This is where you control all things notification-related.
- You'll see a list of all your apps. Tap on the app you want to manage notifications for.
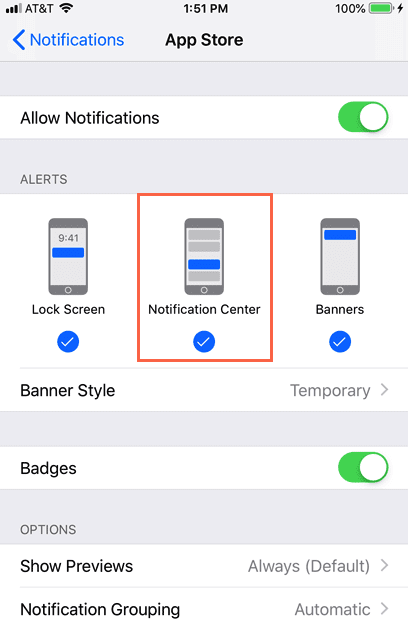
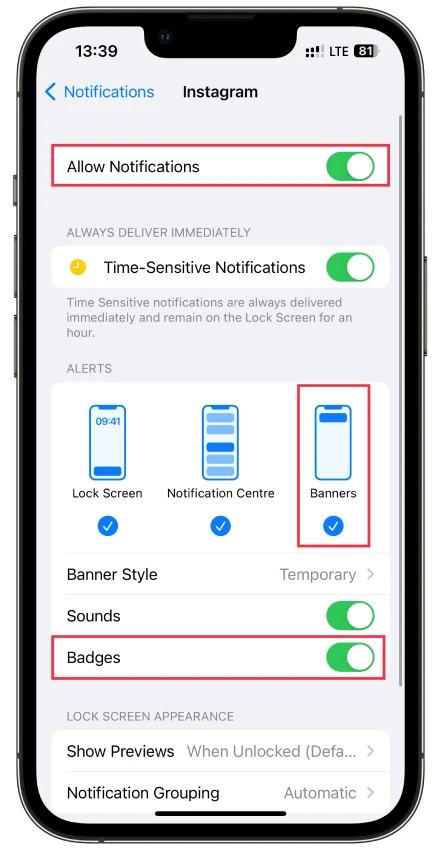
- Make sure the "Allow Notifications" toggle is switched to the "on" position (green). If it's off (grey), you won't receive any notifications from that app.
- Customize your notification preferences. Here, you can choose the alert style (banners, alerts, or none), notification sounds, badges on the app icon, and whether to show notifications on the Lock Screen.
Practical Tip: If you're getting overwhelmed with notifications, take some time to review your settings. You might find that you're receiving alerts from apps you rarely use or that certain notifications aren't as important as you initially thought. Don't be afraid to turn them off – a decluttered notification center is a happy notification center!

Another practical tip: Some apps ask for notification permission when you first open them. If you accidentally tap "Don't Allow," you can always change your mind later in the Settings app as described above.
Enabling and customizing push notifications is a small change that can make a big difference in how you use your iPhone. It’s about staying informed, connected, and in control of your digital world. So go ahead, tweak those settings and enjoy the convenience and personalization that push notifications bring to your daily life. Happy notifying!