Do You Need To Wash The Walls Before Painting

Ever stared at a wall, paintbrush in hand, ready to unleash your inner artist? You're itching to transform that beige blah into a vibrant masterpiece. But wait! Have you considered something…before you even dip that brush?
It's a question that haunts even the most seasoned DIYers. A step that seems like extra work, maybe even unnecessary. Are we talking about washing the walls? You bet we are!
The Great Wall Wash Debate
Some folks dive right in, slapping on the paint with gusto. They figure, "What's the worst that could happen?" Others shudder at the thought of skipping the prep. They envision peeling paint and a general sense of DIY doom. Which side are you on?
Must Read
Imagine your wall as a blank canvas. Not just any canvas, but one that's lived a life. It's collected dust bunnies, absorbed cooking splatters, and maybe even suffered the indignity of sticky fingerprints. Sounds appealing, right?
Now, picture painting over all that gunk. It's like trying to write a love letter on a greasy pizza box. The message might get across, but the experience is…less than ideal. So, are you starting to think about this now?
The Case for Cleanliness
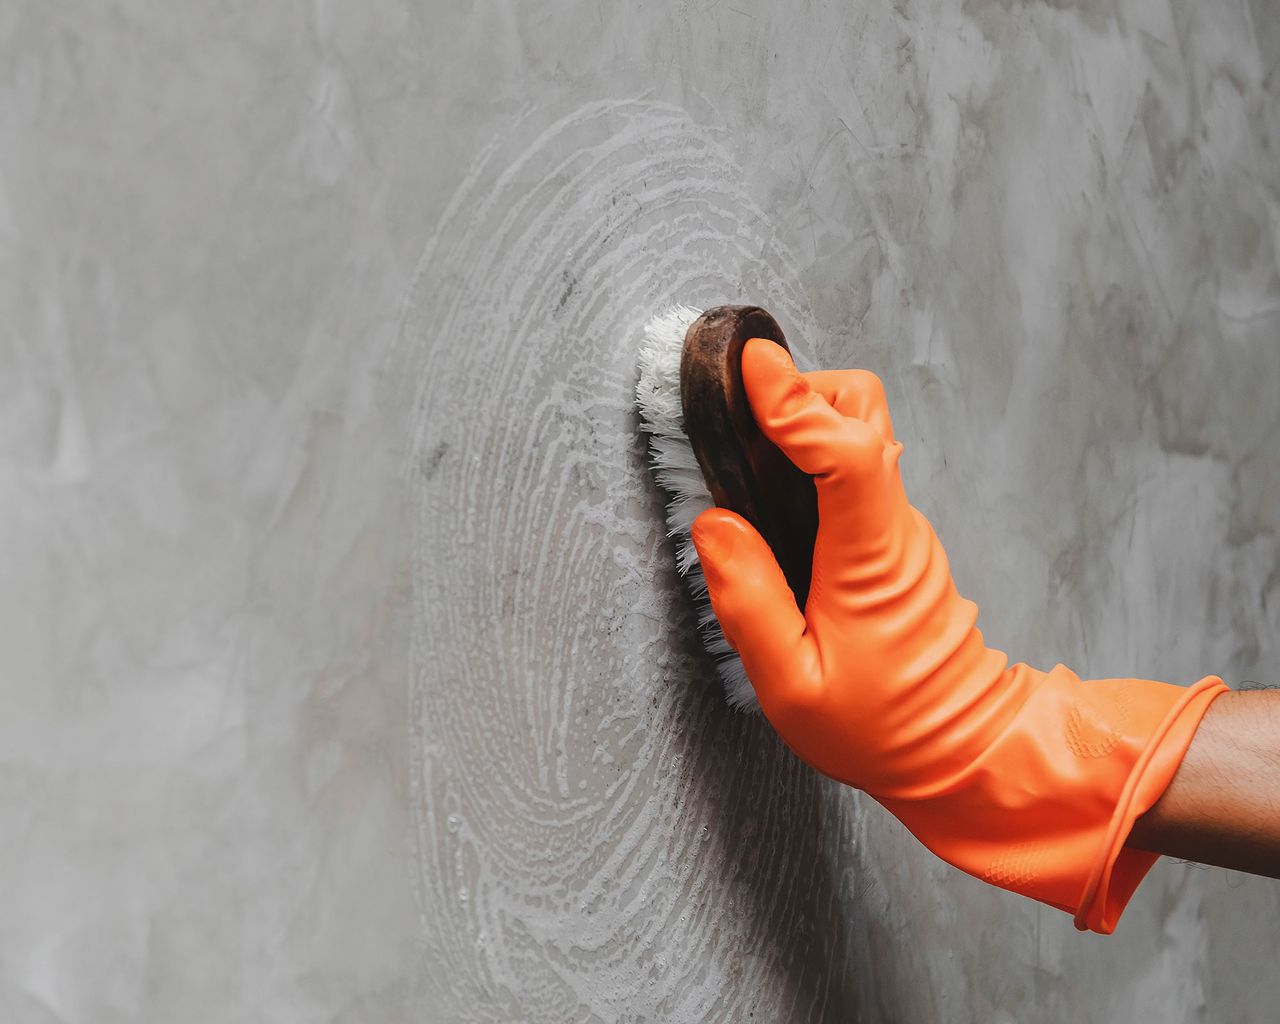
Think about it like this: paint needs to stick. It craves a smooth, clean surface to bond with. Dirt, grime, and grease create a barrier, preventing that perfect adhesion. Which results in some not so perfect painting.
And what about the finish? Ever noticed how a freshly painted wall can sometimes look…uneven? That's often because the paint is adhering differently to various areas. Some are clean, some are yucky.
Washing the walls ensures a consistent surface. The paint glides on smoothly, creating a uniform finish. No more blotchy spots or weird textures. Imagine that professional look, right in your own home!
But Really, Is It That Important?
Okay, okay, we get it. You're busy. Life is short. And the thought of scrubbing walls might not exactly spark joy. But hear us out. It's not as daunting as it seems!
Think of it as a little spa day for your walls. A chance to rejuvenate them before their big makeover. Plus, it gives you a good excuse to put on some music and dance around with a sponge. Admit it, that sounds kind of fun!
And the payoff? A paint job that lasts longer, looks better, and makes you feel like a true DIY superstar. Worth the effort? We think so. It feels like you're getting some bonus points in life.
Tools of the Trade
So, you're convinced. You're ready to embrace the wall-washing revolution. But what do you need? Fear not, intrepid painter! The tools are simple and readily available.
Grab a couple of buckets. One for clean water, one for your cleaning solution. Microfiber cloths are your best friend. They're gentle, absorbent, and reusable. Think of the environment!
A sponge can also come in handy for those tougher spots. And for those hard-to-reach areas, a mop with a microfiber head is a lifesaver. No more straining your back or climbing on precarious ladders. You'll probably want some good music, too!
The Secret Cleaning Solution
Forget harsh chemicals and overpowering smells. The best wall-washing solution is surprisingly simple. Warm water and a little bit of dish soap are usually all you need.
For tougher grime, consider adding a touch of vinegar. It's a natural degreaser and deodorizer. Plus, it's safe for your family and pets. Bonus points for being eco-friendly!
Always test your cleaning solution in an inconspicuous area first. Just to make sure it doesn't damage the paint. Better safe than sorry, right?
The Wall Washing Waltz
Ready to get started? Let the wall-washing waltz begin! Dip your cloth or sponge into the cleaning solution. Wring it out well. You don't want to soak the walls.
Start at the top and work your way down. Overlap your strokes slightly to ensure you're covering every inch. Pay extra attention to areas that are particularly dirty or greasy. Sometimes, these are the high traffic areas near light switches.
Rinse your cloth or sponge frequently in the clean water bucket. You don't want to spread the dirt around. Once you've washed the entire wall, rinse it one more time with clean water. This removes any remaining soap residue. You're almost there!
Patience is a Virtue (and a Necessity)
Once you've washed the walls, resist the urge to start painting immediately. Give them plenty of time to dry completely. This could take several hours, depending on the humidity and temperature. Go have a sandwich, or something.
You can speed up the drying process by opening windows and turning on a fan. Just make sure the room is well-ventilated. Nobody likes a damp wall, or an overly humid room.
Once the walls are completely dry, you're ready to paint! Prepare to be amazed at how smoothly the paint goes on and how vibrant the color looks. You are basically giving yourself the best shot at a clean paint job.
Specific Scenarios and Solutions
Sometimes, you'll encounter walls with specific issues that require special attention. Let's tackle a few common scenarios.
Mold or mildew: If you spot mold or mildew, don't panic. Mix a solution of bleach and water (1 part bleach to 3 parts water). Apply it to the affected areas and let it sit for 10-15 minutes. Rinse thoroughly and allow to dry completely.

Grease splatters: For stubborn grease splatters, try using a degreasing cleaner. Or make a paste of baking soda and water. Apply it to the grease, let it sit for a few minutes, and then scrub gently. You don't want it seeping into other areas.
Sticky residue: Adhesive residue from stickers or tape can be a pain. Try using a hairdryer to warm the adhesive. Then gently peel it off. You can also use a product like Goo Gone to dissolve the residue. Works wonders on many things.
Don't Forget the Details
While you're washing the walls, don't forget the details. These include baseboards, trim, and doors. They often accumulate dust and grime over time. Give them a good wipe-down as well.
Pay special attention to corners and edges. These areas tend to be magnets for dirt and cobwebs. Use a small brush or cotton swab to clean them thoroughly.
And don't forget about light switches and outlet covers. These are often touched by dirty hands. Give them a good cleaning with a disinfectant wipe.
The Ultimate Test: The White Glove Treatment
How do you know if you've washed the walls thoroughly enough? Perform the white glove test! Put on a clean white glove and run it along the wall. If the glove comes back clean, you're good to go.
If the glove comes back dirty, keep washing! It's better to spend a little extra time cleaning now than to end up with a subpar paint job later.

Remember, washing the walls is an investment in your painting project. It ensures a beautiful, long-lasting finish. And it gives you the satisfaction of knowing you did the job right. So, get washing!
Beyond the Basics: A Pro Tip
Want to take your wall-washing game to the next level? Consider using a primer after washing and drying the walls. Primer creates a smooth, even surface for the paint to adhere to. It also helps to block stains and prevent bleed-through.
Choosing the right primer depends on the type of paint you're using and the condition of your walls. Talk to a paint specialist at your local hardware store for recommendations. There are specific ones for moldy or oily surfaces!
Primer is like the unsung hero of the painting world. It might seem like an extra step, but it can make a huge difference in the final result. So, don't underestimate its power.
Embrace the Process
Washing the walls might not be the most glamorous task in the world. But it's a necessary step for achieving a professional-looking paint job. Embrace the process and make it your own.
Put on some music, grab your supplies, and get ready to transform your walls. Think of it as a mini-makeover for your home. It's exciting!
And remember, a little elbow grease goes a long way. With a little effort and attention to detail, you can achieve a stunning paint job that you'll be proud of for years to come.
So, before you reach for that paintbrush, take a moment to consider the humble wall wash. It might just be the secret ingredient to your painting success. Happy painting!