Hey there, welding buddy! Ever feel like you're just... guessing with your TIG amperage when welding stainless steel? Yeah, me too. It's like throwing darts blindfolded, hoping to hit the bullseye, right? Well, let’s talk about the *amazing* (and slightly mysterious) world of TIG amp charts for stainless steel. They're not magic, but they're pretty darn close!
What's the Big Deal with Amperage Anyway?
Okay, so, amperage. In the simplest terms, it's like the "oomph" behind your weld. Too little, and you're just kinda... tickling the metal. Nothing melts. Too much, and *POOF!* You've got a hole. A big, ugly, hole. Not good. Especially when you're trying to, you know, *join* things. And for stainless, getting the right amperage is even *more* crucial, trust me!
Stainless steel is a bit of a diva. It's got all those fancy alloys that make it strong and corrosion-resistant, but those alloys also mean it's super sensitive to heat. You overheat it, and suddenly you're dealing with things like carbide precipitation (fancy talk for "bad welds") and discoloration. Nobody wants rainbow-colored welds unless you're *specifically* going for that, am I right?
Enter the Tig Amp Chart! (Cue Fanfare)
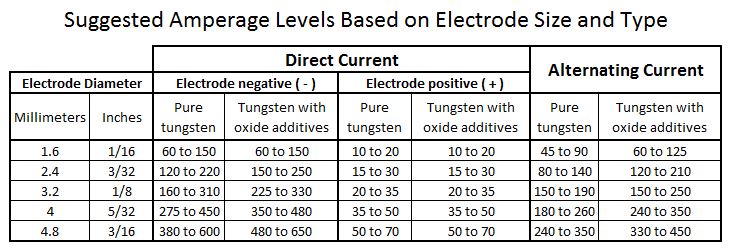
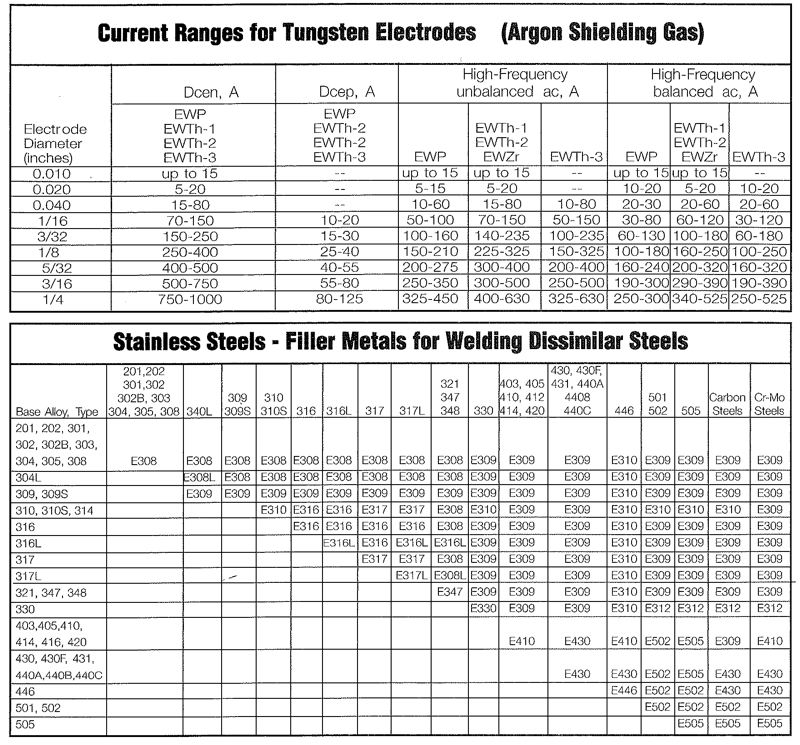
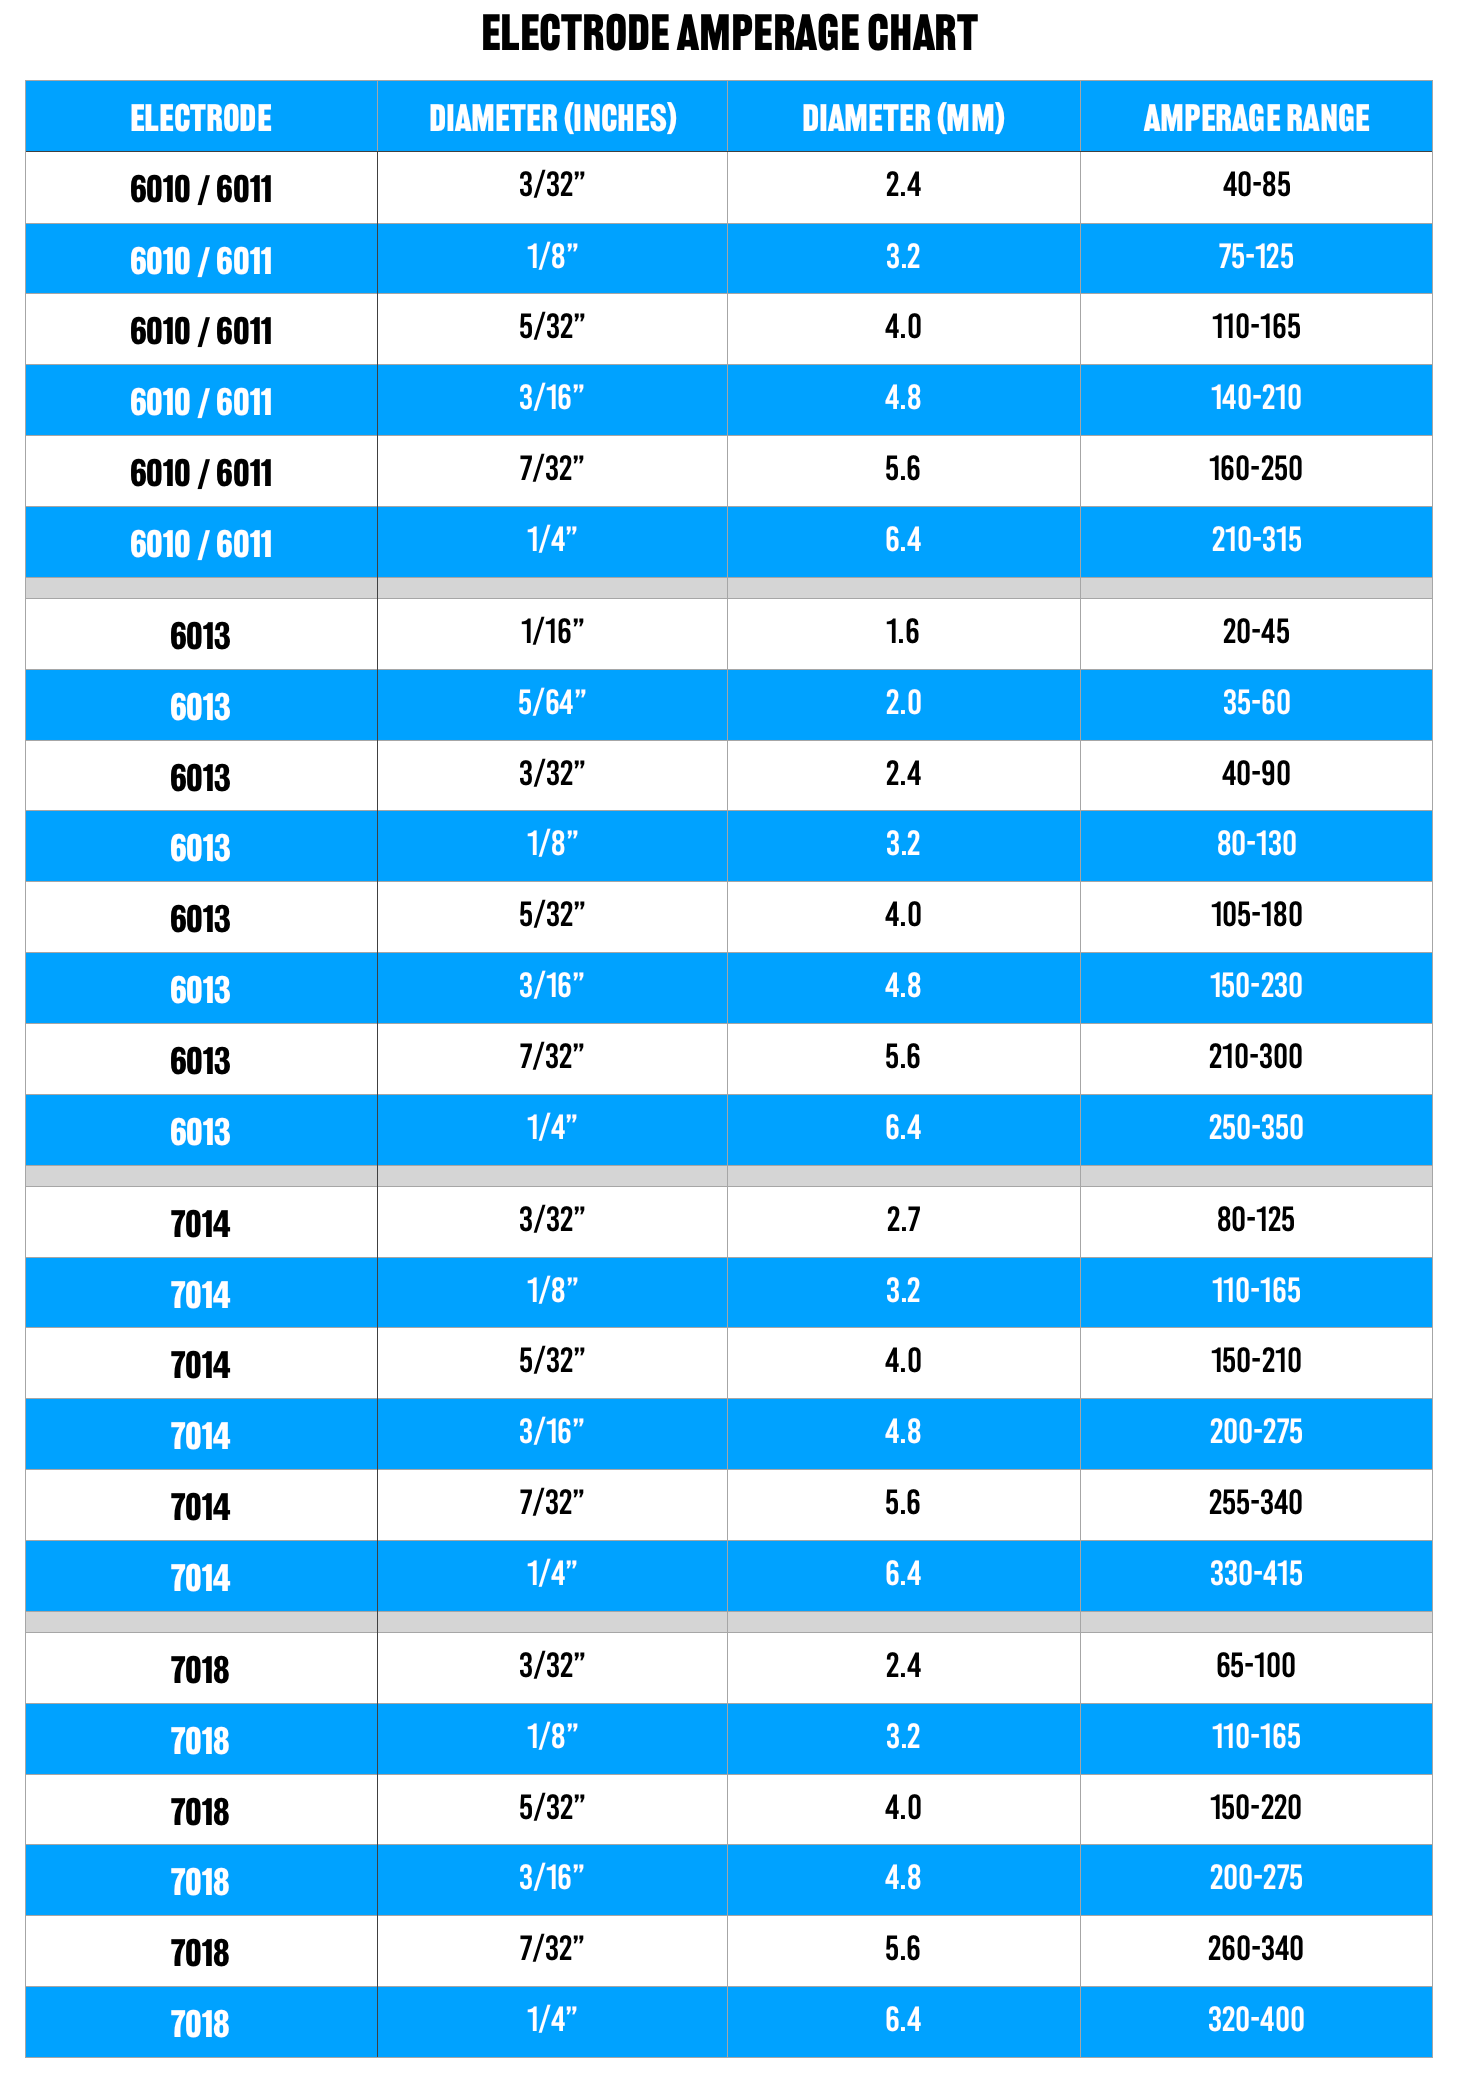
So, what's a poor welder to do? That's where the amp chart comes in! Think of it as your secret weapon, your cheat sheet, your... well, you get the idea. It's a table that gives you a general guideline for the amperage you should use based on the thickness of the stainless steel you're welding. Important: It’s a *guideline*, not gospel. More on that later.
Generally, the thicker the metal, the more amps you need. Makes sense, right? Gotta melt through all that material! Most charts are pretty straightforward. You find the thickness of your stainless steel, and then you see the recommended amperage range. Bam! Instant starting point. You can usually find these charts floating around online, in welding textbooks, or even sometimes plastered to the side of your welding machine. Keep an eye out!
Pro-Tip: Print one out and stick it in your toolbox. You'll thank me later.
But Wait, There's More! (Because There Always Is)
Here's the catch (you knew there'd be one, didn't you?): Amp charts are *not* one-size-fits-all. They're a great starting point, but you'll still need to fine-tune things based on a whole bunch of factors. Think of it like a recipe; the amp chart is the list of ingredients, but *you* are the chef. *You* have to adjust the seasonings, or in this case, the amperage!
What affects your amperage needs? Oh, you know, just a few things:
- The Type of Stainless Steel: 304? 316? They all behave a little differently.
- The Type of Joint: Butt welds, fillet welds, lap welds… they all need slightly different heat inputs.
- Your Welding Technique: Are you a fast mover or a slow burner?
- Your Gas Flow Rate: Too little gas, and you get oxidation. Too much, and you waste gas!
- The Diameter of Your Tungsten Electrode: Yep, even that matters!
See? Complicated! But don't freak out. It just means you need to experiment and pay attention to what's happening. Practice makes perfect, and all that jazz.
So, How Do You Actually Use the Chart?
Okay, let's say you're welding 1/8" (3.2mm) thick 304 stainless steel with a butt joint. You check your amp chart, and it says something like "90-120 amps." Great! Start somewhere in the middle, like 105 amps, and give it a try. Watch what's happening.
Is the puddle melting nicely and flowing smoothly? Awesome! Maybe bump it up a little if you feel like you need more heat. Is the puddle getting too hot and runny? Or are you starting to burn through? Back it off! It's all about finding that sweet spot where the metal melts just right.
Don’t be afraid to experiment! It's better to start too low and slowly increase the amperage than to start too high and immediately blow a hole through your workpiece.
The Bottom Line
TIG amp charts for stainless steel are your friends. They’re useful. They're a great starting point. But they're not a substitute for experience and observation. Use them as a guide, experiment, and *always* pay attention to what's happening with your weld. You'll be laying down beautiful, strong, and perfectly colored stainless steel welds in no time!
Happy welding!