So, you want to tango with a tiny sun? Welcome to the wonderful, slightly terrifying, world of acetylene oxygen torches! Let's be honest, they look intimidating. But hey, so did riding a bike...at first.
First, grab your gear. Think welding helmet, gloves thicker than your grandma's winter mittens, and maybe an asbestos suit (kidding... mostly).
Seriously though, safety first, kids. It's better to look like you're ready for a zombie apocalypse than to actually become a casualty of one.
Getting Started: The Dance Begins
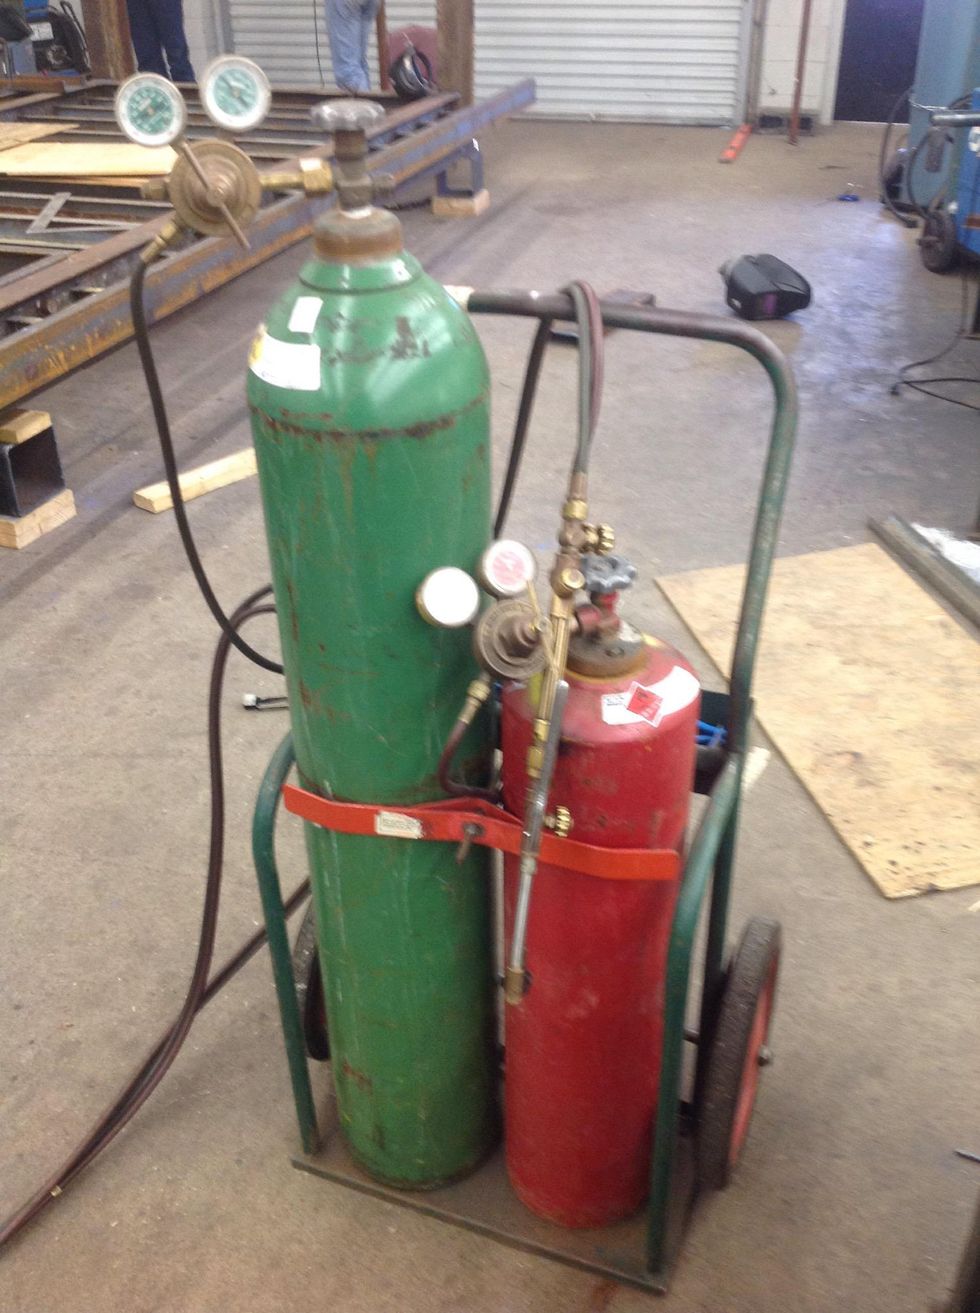
Now, let's talk about setting things up. Attach your oxygen and acetylene regulators to their respective tanks.
Make sure everything's tight. You don't want any leaks. Unless, of course, you're aiming for a spontaneous combustion art piece. (Spoiler alert: you're not.)
Purge those lines! It's like burping a baby, but with highly flammable gas. Fun, right?
Lighting the Flame: Summoning the Tiny Sun
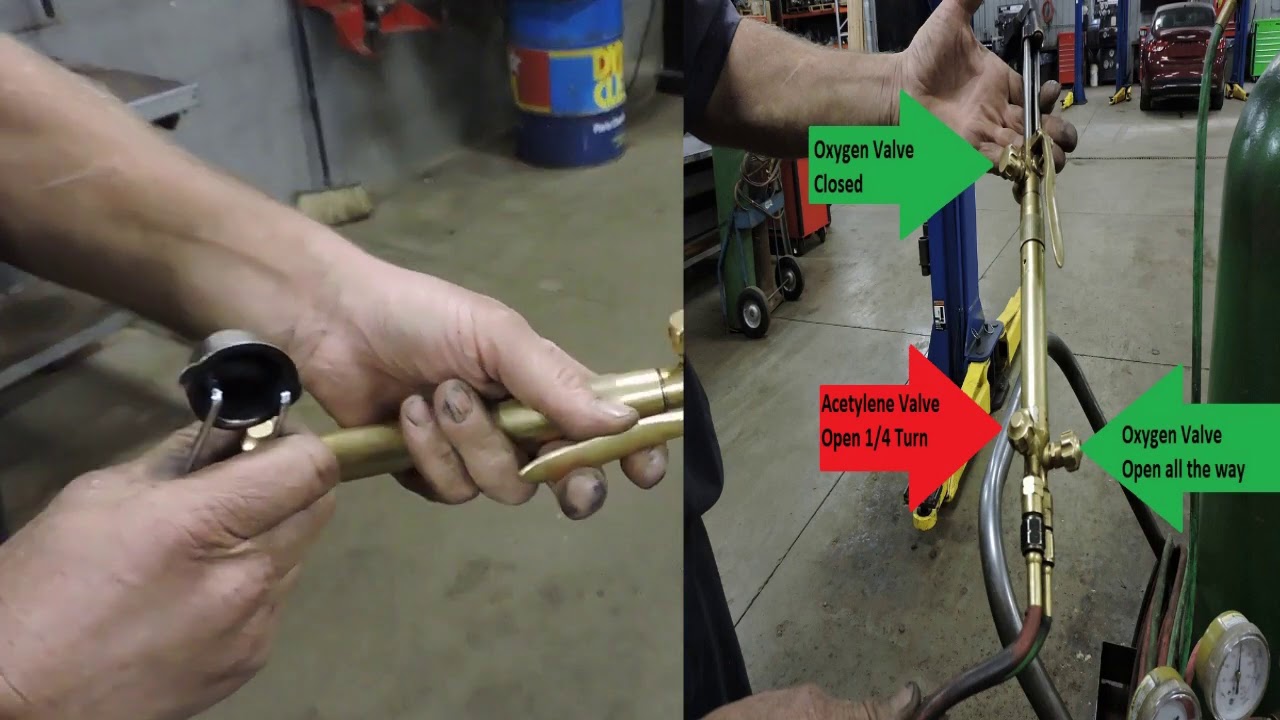
Time for the moment of truth! Open the acetylene valve on the torch a smidge.
Grab your striker – that little flinty gadget that looks like a medieval torture device. Strike it near the torch tip.
Poof! You should have a sooty, orange flame. Don't panic, that's normal. For now.
Slowly add oxygen. Watch the flame change from a grumpy orange blob to a crisp, defined cone.
That inner cone is your sweet spot. That's where the magic happens. Or the accidental melting. Potato, potahto.
Adjust the oxygen and acetylene until you get a neutral flame. Too much acetylene? Feathery edges. Too much oxygen? Harsh, hissing sound.
Unpopular Opinion Time
Okay, unpopular opinion: trying to perfectly analyze flame characteristics using only your eyes is like trying to understand quantum physics by staring at a bowl of cereal. Just tweak it 'til it looks about right, people!
Seriously, you’ll get the hang of it. Don't overthink it.
Welding: Stick 'Em Together
Now for the fun part: welding! Grab your metal pieces and clean them up.
Rust and grime are the enemy. They're like the party poopers of the welding world.
Tack weld your pieces together. Little spot welds to hold everything in place. Like using tape before you commit to superglue.
Then, start your actual weld. Move the torch in small circles or a zigzag pattern.
Add filler rod as needed. Dab it into the molten puddle like you're adding sprinkles to an ice cream cone.
Keep a consistent pace. Too slow, you'll burn through. Too fast, you'll get a weak weld. Goldilocks would be proud of you if you get it just right.
Cutting: Slicing and Dicing
Need to cut some metal? Easy peasy! (Okay, maybe not easy, but definitely doable.)
Switch to a cutting tip. It has that extra oxygen jet in the middle. Looks menacing, doesn't it?
Preheat the metal until it's glowing red. Then, blast it with the oxygen jet.
Watch as the metal melts away like butter on a hot skillet. It's strangely satisfying, in a slightly destructive way.
Troubleshooting: When Things Go Wrong (And They Will)
Backfires? Yeah, they happen. Loud pop, flame goes out. Don't freak out.
Close the torch valves and check everything. Could be a dirty tip, low gas pressure, or maybe you just offended the welding gods.
Overheating? Give the metal a break. It's like running a marathon – gotta pace yourself.
Porous welds? Could be contaminants. Clean your metal better next time, you slacker!
Another Unpopular Opinion
Okay, another controversial one: YouTube tutorials are great, but nothing beats actual hands-on experience. So ditch the screen and get your hands dirty! (Figuratively, of course. Wear gloves!)
Seriously, you will learn more by messing up a few times than you ever will by watching someone else do it perfectly.
Finishing Up: The Aftermath
Once you're done, close the torch valves tightly.
Then close the tank valves. Bleed the pressure from the regulators.
Coil up your hoses neatly. A tidy workspace is a happy workspace. Or at least, a less chaotic one.
Let the metal cool down. Don't be tempted to dunk it in water. That's just asking for trouble.
Inspect your work. Look for cracks, porosity, and other imperfections.
Grind down any rough edges. Make it pretty! Or at least, make it not slice your fingers off.
And finally, brag about your accomplishments. You just tamed a tiny sun! You deserve a pat on the back (and maybe a beer).
Safety First! (Yes, Really)
Okay, I know I've been joking around, but seriously, safety is paramount.
Read the manufacturer's instructions for your equipment. They're boring, but important.
Wear appropriate personal protective equipment. No exceptions.
Work in a well-ventilated area. You don't want to breathe in those fumes.
Keep a fire extinguisher handy. Just in case.
And most importantly, don't be an idiot. Think before you act. Welding is dangerous but when using the proper equipment it can be done safely.
Final Unpopular Opinion
One last unpopular opinion: Don't be afraid to ask for help! There's no shame in admitting you don't know something. In fact, it's a sign of intelligence!
Find a more experienced welder and pick their brain. They'll probably be happy to share their knowledge (and maybe even laugh at your mistakes).
Now go forth and conquer, oh brave welder! Just don't set anything on fire... unless it's intentional.