Alright, folks, gather 'round! Let's talk about something we've all faced: that stubborn sink drain stopper. You know, the little guy that mysteriously decides to stop cooperating, usually when you’re elbow-deep in dishwater and regretting that third helping of chili? It's like a tiny, chrome-plated villain holding your plumbing hostage.
Now, before you grab a sledgehammer (tempting, I know!), let's explore how to evict this drain-dwelling squatter without resorting to demolition. Because, trust me, drywall repair is way more annoying than a stuck stopper.
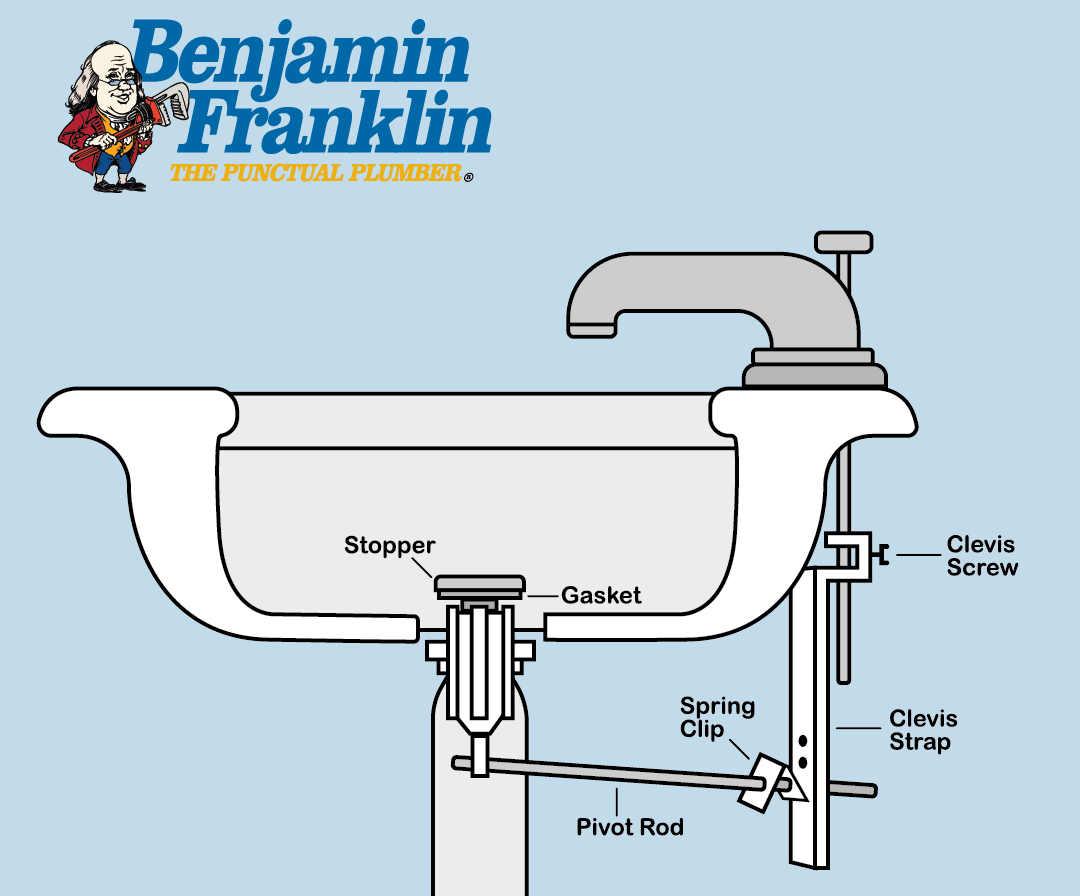
The Anatomy of a Drain Stopper (and Why It Hates You)
First, a little stopper 101. There are generally three types you'll encounter:
- Pop-up stoppers: These are the most common. They have a lever behind the faucet that, when you push or pull, makes the stopper go up and down. Seems simple, right? Wrong! These are notorious for getting gunked up with hair, soap scum, and the general detritus of modern life.
- Lift-and-turn stoppers: You lift, you turn, you pray it works. These guys are slightly less prone to catastrophic failure, but they can still be a pain.
- Push-and-seal stoppers: Push to seal, push to release. Sounds brilliant, except when they decide to seal permanently. These can be tricky!
The real reason they malfunction? They're jealous of your shiny new dish sponge. Or maybe it's just physics. I'm no scientist.
Operation: Stopper Extraction – Phase 1: The Gentle Approach
Okay, before we get medieval, let's try the easy stuff. This is like trying to reason with a toddler before resorting to time-out.
Step 1: The Wiggle and Jiggle. Sometimes, that's all it takes. Give the stopper a good wiggle, a little twist, and see if it loosens up. Imagine you're trying to coax a particularly stubborn olive out of a jar.
Step 2: The Boiling Water Assault. Hot water can dissolve some of the gunk that's holding the stopper hostage. Carefully pour boiling water down the drain (avoiding burns, please!) and see if that frees things up. Think of it as a miniature spa treatment for your drain...a spa treatment designed to evict the current resident.
Step 3: The Baking Soda and Vinegar Volcano. This is the classic DIY drain cleaner. Pour about a cup of baking soda down the drain, followed by a cup of vinegar. It'll fizz like a science experiment gone wild (but a safe one!). Let it sit for about 30 minutes, then flush with hot water. This combo can dislodge some pretty impressive sludge. It’s like a tiny, bubbly, cleaning army going to war against the grime.
Operation: Stopper Extraction – Phase 2: Getting Down and Dirty
Still stuck? Alright, time to get our hands dirty. We're going in!
Step 1: Identify Your Stopper Type. This is crucial! Trying to remove a pop-up stopper like it's a lift-and-turn is just going to lead to frustration and possibly a broken stopper. Ask yourself: "Self, does this stopper have a lever behind the faucet?" If yes, you're dealing with a pop-up. If you lift and turn it, that's pretty self-explanatory. If you push and it seals/unseals, well… you're probably already ahead of me.
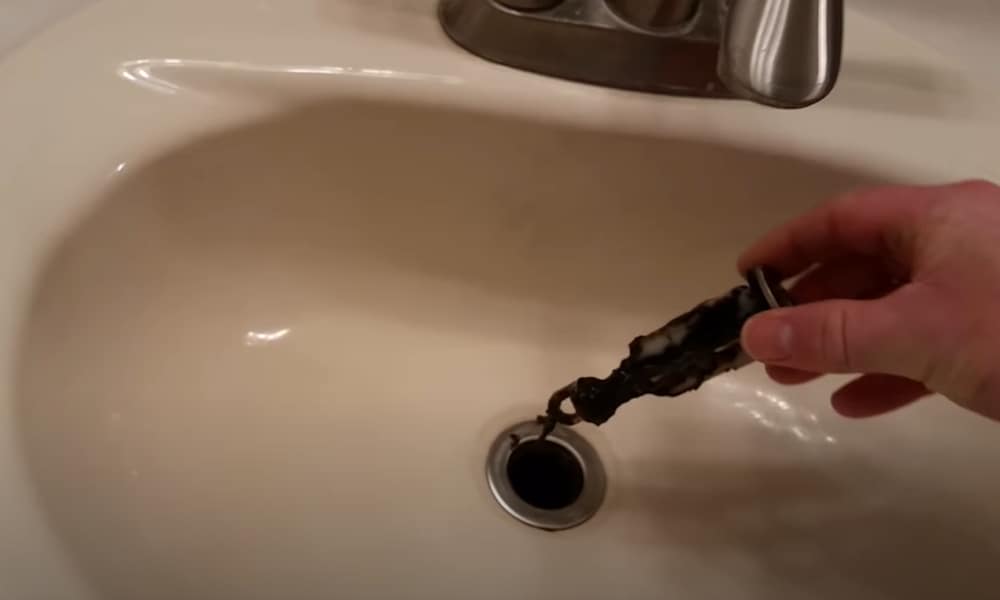
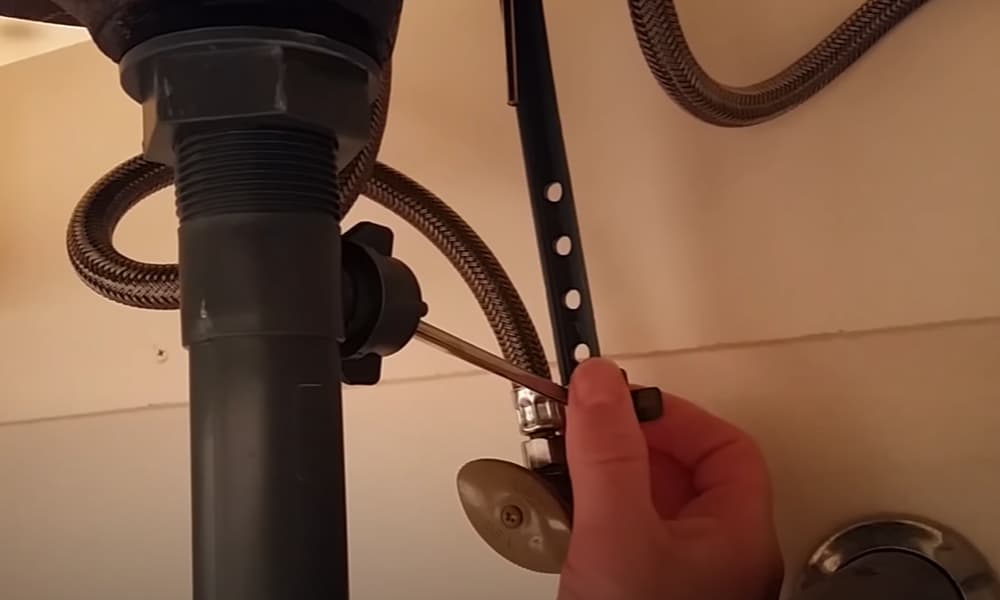
Step 2: For Pop-Up Stoppers: The Under-Sink Adventure. This is where things get interesting (and possibly a little claustrophobic). Grab a flashlight and prepare to become intimately acquainted with the underside of your sink. You're looking for a horizontal rod connected to the drainpipe. This is the linkage that controls the stopper.
Loosen the nut that connects the rod to the vertical piece that goes up to the stopper. Once loosened, you should be able to pull the rod out. Then, with a little luck and some gentle persuasion, you can lift the stopper straight up and out. Be prepared for some… *interesting* debris to come along with it.
Step 3: For Lift-and-Turn Stoppers: The Unscrew and Pray Method. These usually have a screw on top. Unscrew it, and with a little wiggling, the entire stopper assembly should lift out. If it doesn't budge, try a little penetrating oil (like WD-40) and let it sit for a few minutes before trying again.
Step 4: For Push-and-Seal Stoppers: The Vacuum and Pray Method. These can be the trickiest. First, try pushing down firmly on the stopper and then quickly releasing. This can sometimes break the seal. If that doesn't work, try using a plunger. Sometimes, a good vacuum can do the trick. As a last resort, you might need to use a specialized drain tool to grab and twist the stopper. If all else fails, call a plumber. Seriously. Some battles just aren't worth fighting.
The Aftermath: Cleaning and Prevention
Congratulations! You've successfully evicted the drain stopper! Now, before you celebrate with a victory dance (highly recommended), let's clean that sucker. Scrub it with soap and water, remove any hair or gunk, and generally make it presentable. You might also want to clean the drain itself while you're at it.
To prevent future stopper dramas, consider using a drain screen to catch hair and other debris. And maybe, just maybe, avoid that fourth helping of chili next time.
Good luck, and may your drains forever flow freely!