Let's talk threads! No, not the kind that hold your clothes together, but the virtual kind you can create in Solidworks. Why threads in a CAD program? Because it's surprisingly fun, incredibly useful, and a gateway to bringing your digital designs into the real world. Think about it: custom bolts, intricately designed screws, or even artistic creations incorporating threaded elements. Mastering threads in Solidworks opens up a world of possibilities.
So, who benefits from knowing how to create threads in Solidworks? Well, pretty much everyone! For beginners, understanding threading is a crucial step towards grasping more complex design features. It's like learning your ABCs before writing a novel. It provides a foundational understanding of feature creation and parametric modeling. For families and hobbyists involved in DIY projects or creating things like 3D printed toys, knowing how to model threads means you can design and print functional parts that actually screw together. Imagine designing a custom camera mount for your next family vacation or creating interlocking building blocks that are sturdier than anything you can buy in a store! And for seasoned Solidworks users, this skill is just another tool in their arsenal, allowing for more precise and efficient design.
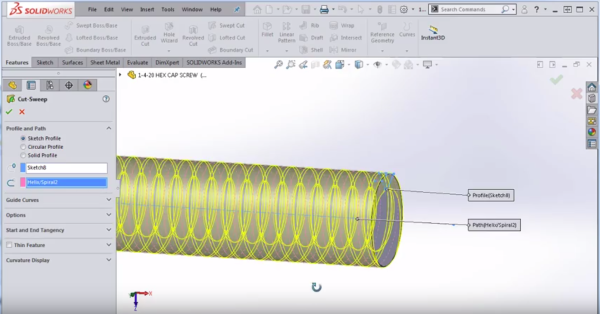
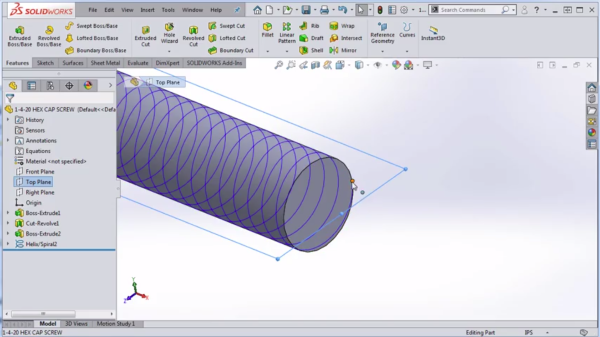
There are a few common ways to create threads in Solidworks. The most straightforward method is using the "Hole Wizard". This handy tool lets you select standard thread sizes (like metric or inch), automatically generating the correct geometry. Another option is the "Thread" feature, which offers more control over thread profiles and allows for creating custom thread forms. Want to get really fancy? You can even create a helical sketch and use the "Swept Cut" or "Swept Boss/Base" feature to carve your threads. Think about using this technique to create a unique threaded closure for a custom container, perhaps for homemade spices or bath salts. You could even experiment with different thread pitches and depths to achieve the perfect fit and look.
Ready to dive in? Here are a few simple, practical tips to get you started:
- Start with the Hole Wizard: It's the easiest way to create standard threads and a great learning tool.
- Pay attention to thread size: Make sure the thread size you're modeling matches the real-world component you intend to use. This is crucial for functionality.
- Use the Cosmetic Thread option: For visual representations only, the "Cosmetic Thread" option saves processing power by displaying a thread texture without actually creating the geometry. Perfect for reducing file size and speeding up rendering.
- Practice makes perfect: Don't be afraid to experiment with different thread types and sizes. The more you practice, the more comfortable you'll become with the process.
- Utilize Solidworks Help: Solidworks has a comprehensive help system with tutorials and examples. Don't hesitate to use it!
Creating threads in Solidworks might seem daunting at first, but with a little practice, you'll be designing and modeling threaded components like a pro. Remember to have fun, experiment with different techniques, and enjoy the satisfaction of bringing your digital designs to life! It's a small detail that can make a huge difference in the functionality and aesthetic of your creations.