Alright, so you've decided to embark on the noble quest of keeping tiny, finned roommates. Congratulations! But before you start picturing serene underwater landscapes, let's talk about something less glamorous but essential: filtration. Think of it like this: your fish tank is basically a miniature, self-contained city. And just like any city, it needs someone to take out the trash. That's where your filter comes in.
Now, buying a filter from the store is easy, sure. But where's the fun in that? Plus, those things can be surprisingly expensive. Why shell out the big bucks when you can channel your inner MacGyver and build one yourself? Don't worry, we're not talking about complex engineering here. This is more like crafting than rocket science. Think of it as a super-powered spa day for your fish, but you're the spa therapist.
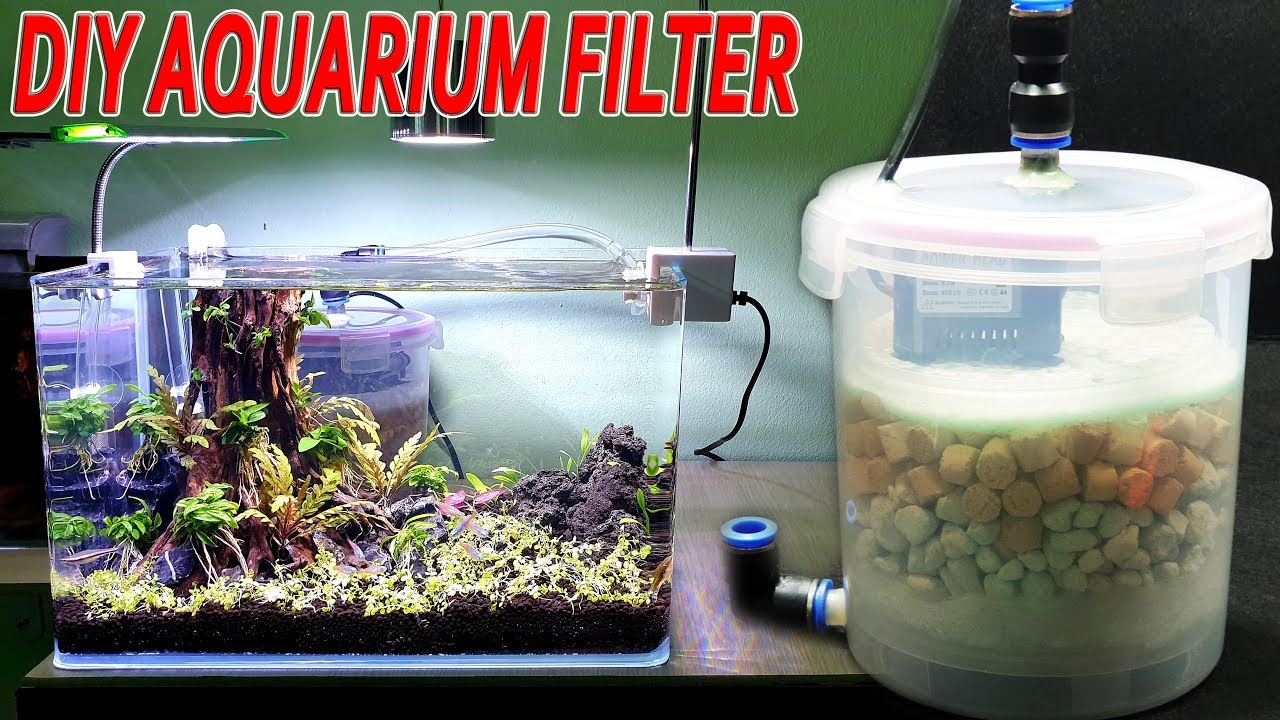
What You'll Need (The "Gather Your Supplies" Montage)
First, let's round up the usual suspects. You probably have most of this stuff lying around already. Think of it as a scavenger hunt, but instead of treasure, you're finding the ingredients for a clean fish tank:
- A Plastic Bottle: This is your main housing. A large soda bottle or a water bottle will work just fine. Think of it as the apartment building for your filter media.
- Filter Media: This is where the magic happens. You'll need a few different layers.
- Coarse Filter: Like sponge or foam. This catches the big chunks, like uneaten food and... well, you know.
- Fine Filter: Like filter floss or even pillow stuffing (clean, unused, of course!). This polishes the water and removes finer particles.
- Biological Filter: This is where the good bacteria live. They eat the bad stuff in your tank. Ceramic rings or bio-balls are great for this.
- An Air Pump and Air Stone: The air pump provides the power, and the air stone creates bubbles that help move the water through your filter. Think of it as the circulatory system.
- Air Tubing: Connects the air pump to the air stone. Simple!
- A Weight: To keep the air stone at the bottom of the bottle. A small rock or a lead fishing weight works well.
- Scissors or a Knife: For cutting the bottle. (Adult supervision if you're, you know, not an adult).
Let's Get Building (The "Assembly Line" Segment)
Okay, now for the fun part. Time to put those DIY skills to the test! Don't worry if it's not perfect; even a slightly wonky filter is better than no filter at all.
- Cut the Bottle: Cut the top off the plastic bottle. How much you cut off depends on the size of your bottle and how much filter media you want to use. Think of it like designing the penthouse suite of your filter.
- Layer the Filter Media: Start with the coarse filter at the bottom, then add the fine filter, and finally the biological filter on top. Think of it as building a layered cake, but instead of frosting, you have beneficial bacteria.
- Attach the Air Stone: Attach the air stone to the end of the air tubing and weigh it down with your weight.
- Insert the Air Stone: Place the air stone at the bottom of the bottle, on top of the coarse filter.
- Connect to the Air Pump: Run the air tubing out of the bottle and connect it to your air pump.
- Place in the Tank: Gently lower your homemade filter into the tank. Make sure the air pump is placed above the water level to prevent back-siphoning.
The Moment of Truth (The "Will It Work?" Reveal)
Plug in the air pump! You should see bubbles rising through the filter media. This is good! This means your filter is working, circulating water and keeping your fishy friends happy. If you don't see bubbles, double-check your connections and make sure the air pump is working. Sometimes, it's as simple as making sure everything's plugged in (we've all been there!).
Important: Don't expect crystal-clear water overnight. It takes time for the beneficial bacteria to colonize the filter media. Give it a week or two, and you should see a noticeable improvement in water clarity. This is where patience comes in, like waiting for that online order to arrive.
And there you have it! You've successfully built your own fish tank filter. You're basically a fish-keeping guru now. Pat yourself on the back and enjoy watching your fish swim around in their newly sparkling-clean home. Just remember to clean your filter regularly (gently rinse the filter media in used tank water to avoid killing the beneficial bacteria). Happy fish-keeping!


