/installing-poke-through-electrical-floor-outlet-1824669-10-3177b76ba4784cbd9cac9f548d6bd398.jpg?strip=all)
Ever feel like you're playing a game of electrical outlet Tetris? You're constantly juggling charging cables, extension cords snake across the floor, and you're always one outlet short of a fully powered party. Well, what if I told you that adding a new outlet from an existing one is actually a surprisingly achievable DIY project? It's like unlocking a secret level in home improvement!
The purpose is simple: convenience. Imagine finally having an outlet exactly where you need it, banishing the clutter and chaos of power strips forever. Think about being able to plug in that new lamp right next to your reading chair, or finally having a dedicated charging station in your kitchen. The benefits are numerous. You'll improve your home's functionality, increase its value (yes, really!), and gain a serious sense of accomplishment. Plus, you'll save money by avoiding expensive electrician call-out fees for a relatively straightforward task.
But before we get started, let's talk about safety. Electricity is powerful, and respect is key. Always, always, always turn off the power at the circuit breaker before you even think about touching any wires. Seriously. Double-check that the power is off using a non-contact voltage tester. If you're even slightly unsure about anything, it's best to call a qualified electrician. Safety first!
Okay, feeling brave? Here's a simplified rundown of the process:
- Gather your supplies: You'll need a new electrical outlet, an electrical box (choose one that fits your wall), some wire (typically 12/2 or 14/2 NM cable – check your local building codes!), wire connectors (wire nuts), a screwdriver, wire strippers, a drill (possibly with a hole saw, depending on your wall type), and that all-important non-contact voltage tester.
- Plan your route: Decide where you want your new outlet and how you'll run the wire from the existing outlet. Consider the easiest and safest path – you might need to cut into drywall.
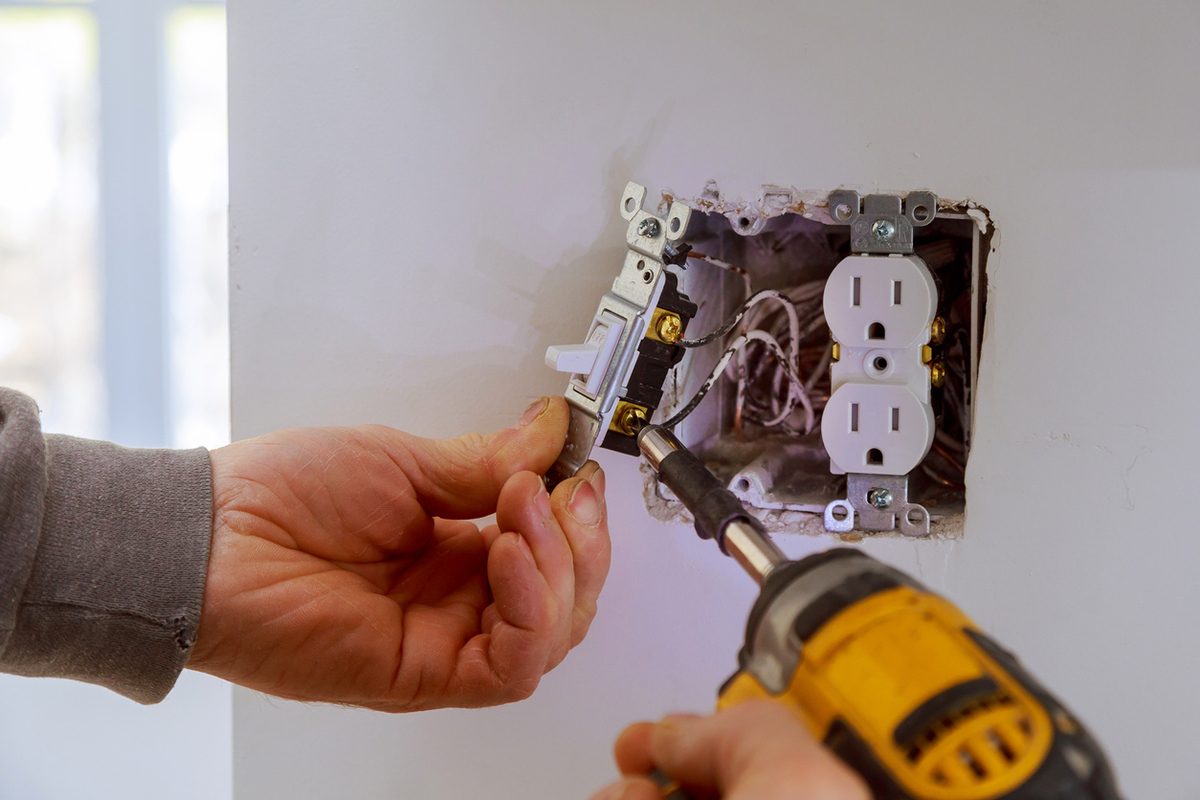
- Prepare the existing outlet: Carefully remove the cover plate and outlet from the existing electrical box. Remember that non-contact voltage tester? Use it again to be absolutely sure the power is off.
- Connect the wires: This is where things get a bit technical. You'll be connecting the wires from the new cable to the wires in the existing box using wire connectors. Make sure to match the colors correctly: black to black (hot), white to white (neutral), and bare copper or green to bare copper or green (ground). Proper wiring is crucial for safety!
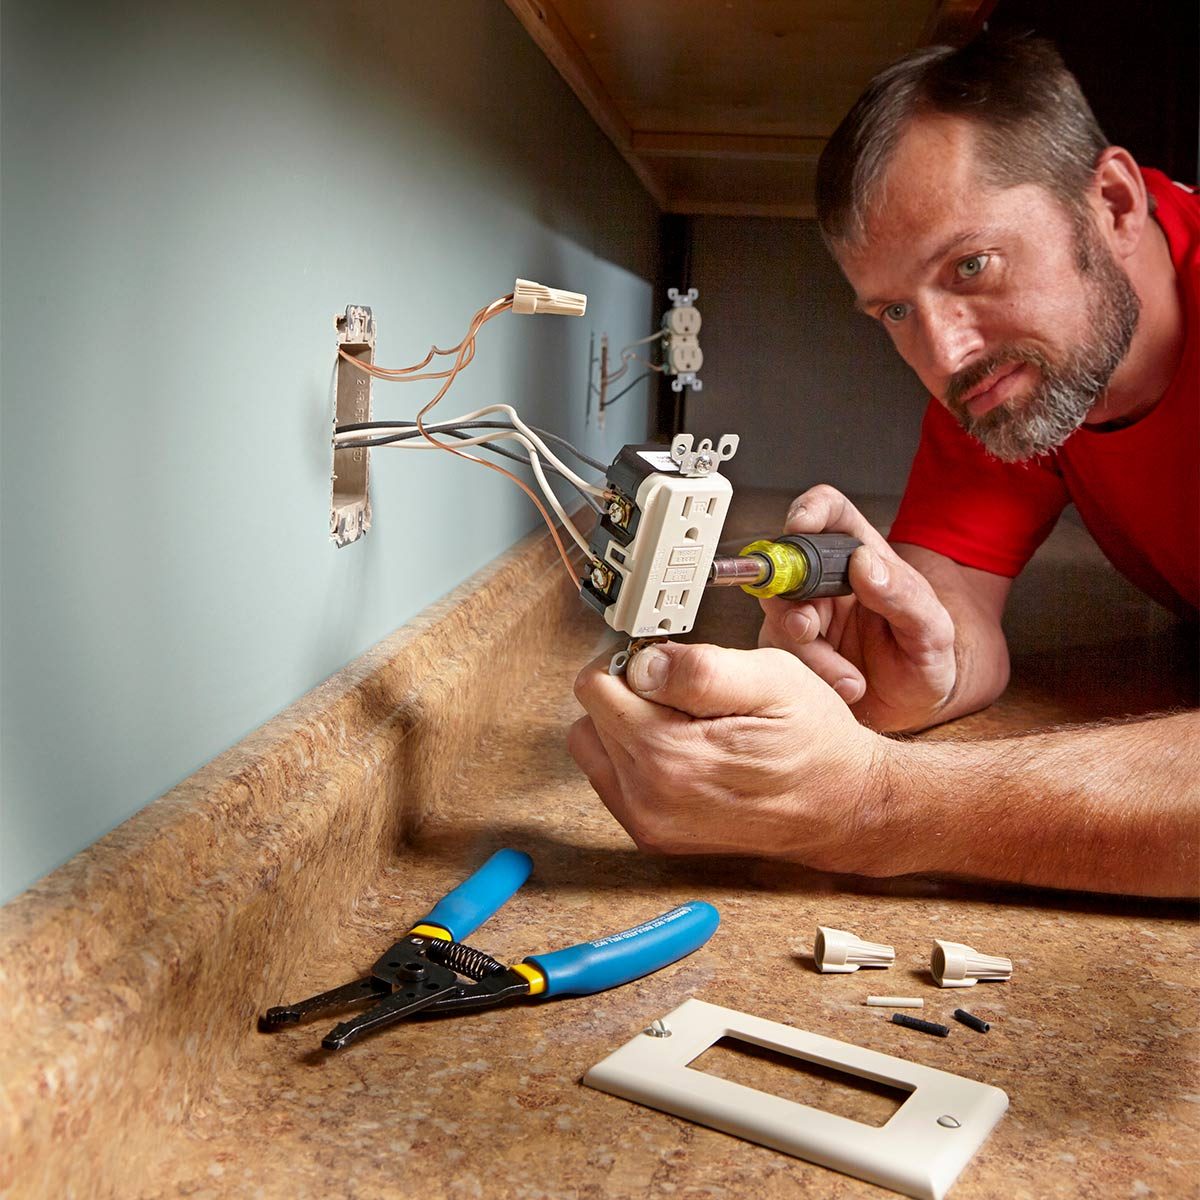
- Install the new outlet: Run the new cable to the location of your new outlet, install the electrical box, and connect the wires to the new outlet, again matching the colors. Secure the outlet in the box.
- Test and enjoy: Carefully replace the existing outlet, put the cover plates back on both outlets, and flip the circuit breaker back on. Use your non-contact voltage tester to ensure everything is working correctly. Then, plug something in and bask in the glory of your newly powered domain!
Adding an outlet isn't rocket science, but it's not a walk in the park either. Take your time, be meticulous, and prioritize safety. And remember, when in doubt, call a professional! Happy wiring (safely)!
/how-to-wire-an-outlet-1152325-08-b1c00b00cded4d318392f30e7a8a7e58.jpg?strip=all)