Alright, friend! So, you're thinking of adding an inverter to your RV? Excellent choice! It's like giving your RV a superpower – the power to use your regular household appliances even when you're not plugged into shore power. Think blenders for margaritas in the middle of nowhere. Need I say more?
Now, installing an inverter might sound intimidating, but trust me, it's totally doable. I'm no electrician (I once tried to change a lightbulb and ended up plunging my entire house into darkness - true story!), but I managed to install mine, and so can you. Just follow these steps, and you'll be enjoying off-grid smoothies in no time. Just remember to be safe, and if at any point you're feeling unsure, call a professional. Electricity is not something to mess around with!
Step 1: Gather Your Supplies (The Treasure Hunt!)
First, you'll need to gather your supplies. Think of it like a treasure hunt, but instead of gold, you're looking for useful tools. Here’s what you’ll need:
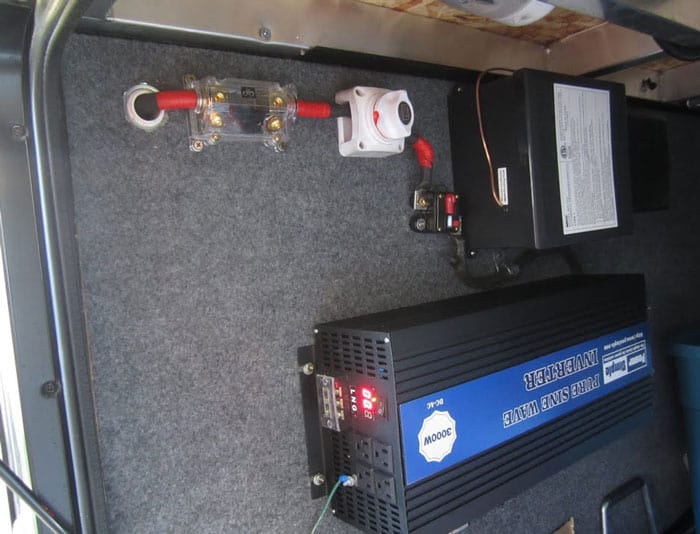
- An inverter. Choose one that’s powerful enough for your needs! Don't be like me and buy a tiny one only to realize it can barely power a nightlight. Research, my friend, research!
- A battery bank. The inverter needs power, and that comes from your RV batteries. Make sure they're in good condition. Weak batteries will lead to weak power - and nobody wants weak margaritas.
- Heavy-gauge cables. These are crucial for connecting the inverter to the battery. Don't skimp on these! Think of them as the superhighways for electricity.
- A fuse or circuit breaker. Safety first! This protects your inverter and your RV from overloads. Consider it your electrical knight in shining armor.
- A fuse holder (if using a fuse).
- A grounding cable. This grounds the inverter to the RV chassis for safety. It's like giving the electricity a safe place to go if something goes wrong.
- Cable lugs. These attach to the ends of the cables for easy and secure connections.
- A lug crimper. For attaching the lugs to the cables. This tool can be rented from most hardware stores.
- A drill (maybe). You might need this to create mounting holes.
- Screws or bolts. For mounting the inverter.
- A multimeter. For testing voltage and continuity. This is your electrical detective, helping you solve any mysteries that might arise.
- Wire strippers/cutters.
- Electrical tape.
- Safety glasses. Seriously, wear these!
- Gloves. Insulated gloves are a good idea.
Step 2: Choose a Location (Location, Location, Location!)
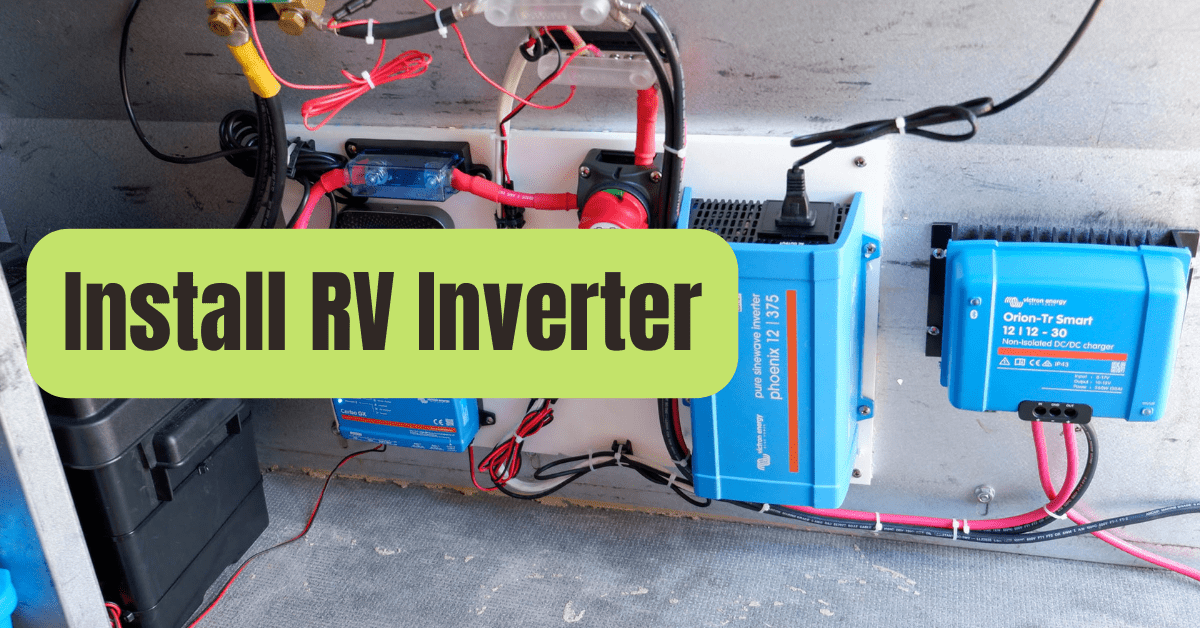
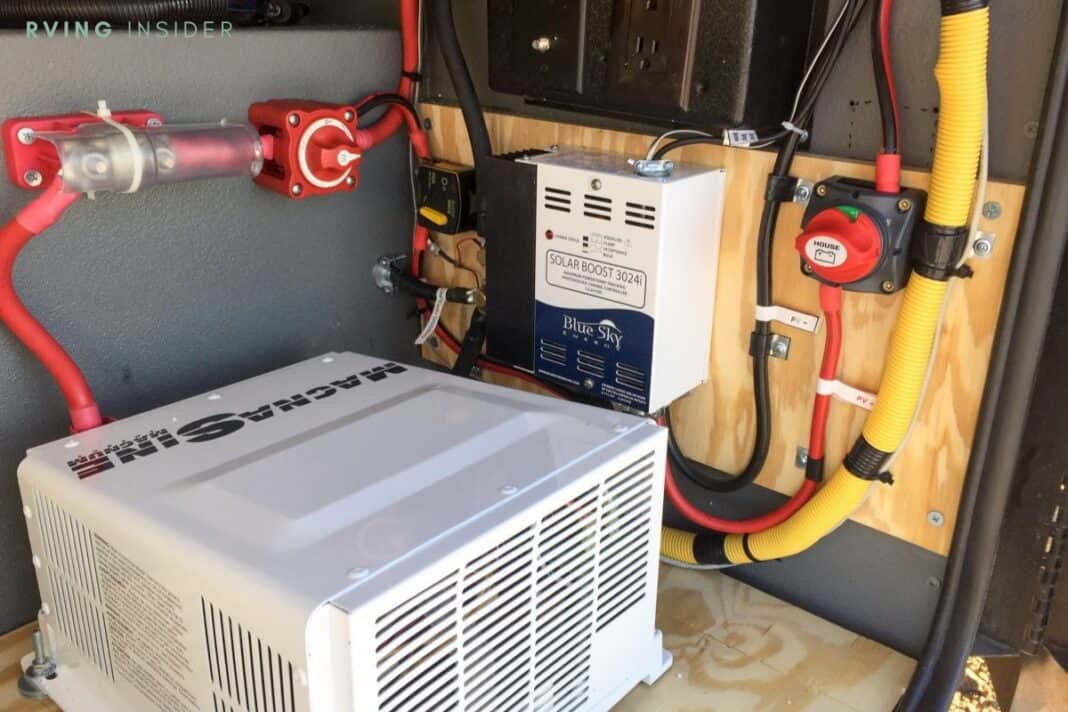
Where you put your inverter matters. You want a spot that's close to your battery bank (shorter cables = less voltage drop), well-ventilated (inverters can get hot), and protected from the elements. A basement compartment is often a good choice. Avoid placing it near anything flammable or in a high-traffic area where it could get bumped.
Step 3: Disconnect the Batteries (Safety Dance!)
This is crucial! Before you touch anything electrical, disconnect the negative terminal of your RV batteries. This prevents accidental shocks. Treat electricity with respect, and it will treat you the same. Consider this your "safety dance" – do it right, and you'll avoid getting zapped.
Step 4: Install the Inverter (The Nitty-Gritty!)
Now for the fun part! (Okay, maybe not *fun*, but definitely important).
- Mount the inverter securely in your chosen location.
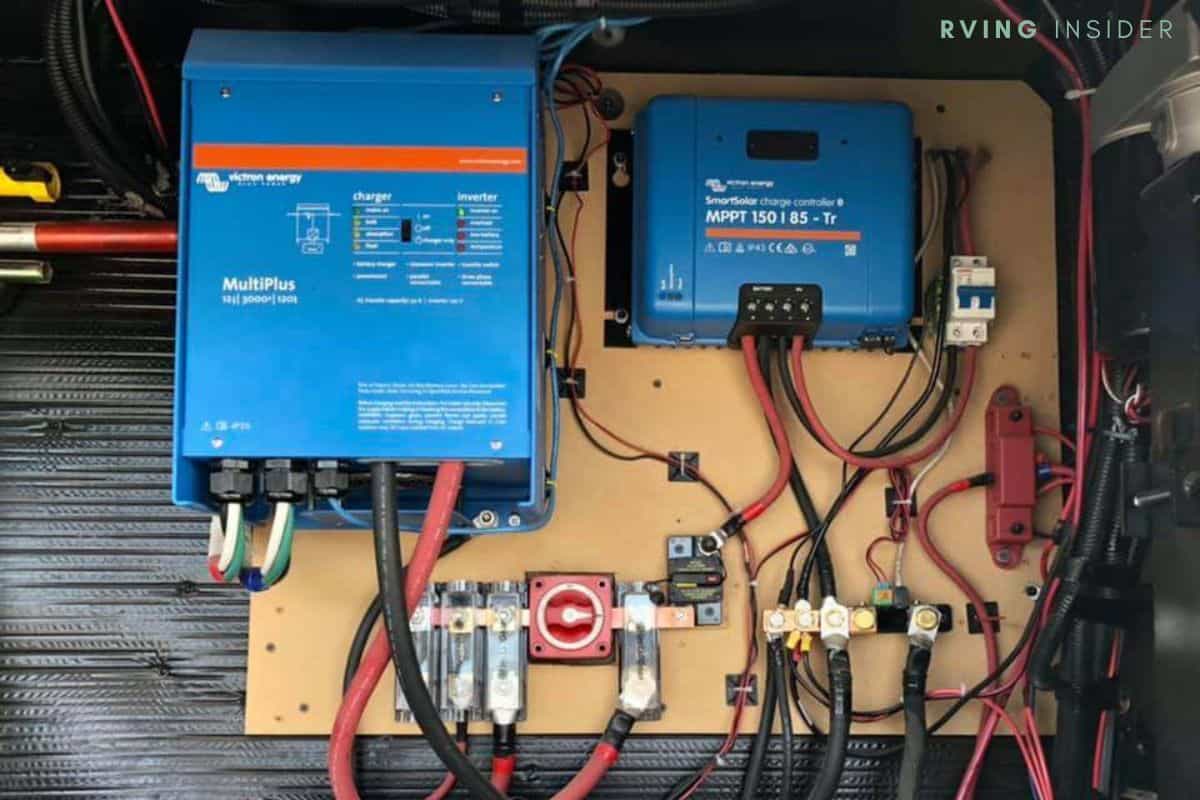
- Connect the heavy-gauge cables from the inverter to the battery bank. Pay close attention to polarity! Positive to positive, negative to negative. Double-check! Triple-check! Getting this wrong can fry your inverter (and possibly your RV).
- Install the fuse or circuit breaker in the positive cable, as close to the battery as possible. This protects your inverter.
- Connect the grounding cable from the inverter to the RV chassis.
- Double-check all connections to make sure they are tight and secure.
Step 5: Reconnect the Batteries (Power Up!)
Once you're confident that everything is connected correctly, reconnect the negative terminal of your RV batteries. Prepare for the magic!
Step 6: Test the Inverter (Let There Be Light!)
Turn on the inverter and test it with a small appliance, like a lamp. If it works, congratulations! You've successfully installed an inverter! If it doesn't work, don't panic. Double-check all your connections, and consult the inverter's manual.
If it works great, test it with something bigger! (Within the wattage limits of your inverter of course!)
Step 7: Enjoy Your Off-Grid Freedom! (Margarita Time!)
Now that you have an inverter, you can enjoy all the comforts of home even when you're boondocking in the middle of nowhere. Go forth and explore! Blend those margaritas! Watch your favorite movies! The world is your oyster (powered by your inverter!).
Installing an inverter might seem a little daunting at first, but with a little patience and a willingness to learn, you can absolutely do it. And the reward – the freedom to use your appliances anywhere, anytime – is well worth the effort. So go ahead, take the plunge! You've got this! And remember, if I can do it, anyone can. Now, if you'll excuse me, I have a blender full of margaritas calling my name. Happy camping!