Alright, gather 'round, folks! Let's talk about product prototypes. You know, those things that are supposed to look like your brilliant idea, but usually end up looking like something your cat coughed up after a particularly experimental meal. Don't worry, we've all been there. But fear not! I'm here to guide you through the (sometimes hilarious) process of creating a prototype that actually… well, works. Or at least, doesn't immediately burst into flames.
Step 1: Brain Dump (aka The "Eureka!"...Followed by Panic)
First things first, you need to define what problem you're trying to solve. Is it world peace? Probably not. More likely, it's something like "how to open a jar of pickles without resorting to violence" or "a self-folding laundry basket that doesn't require a PhD in origami." Once you’ve identified the problem, brainstorm like your life depends on it. Seriously, go wild! No idea is too stupid. Write everything down – even that one about the pickle-opening robot powered by hamsters on tiny treadmills. You never know when a nugget of genius might be hiding in the absurdity. Remember, Post-it notes are your best friends at this stage (next to caffeine, of course). Use them! Abuse them!
Then, take all those Post-it notes and try to make sense of the glorious mess. Group similar ideas. Highlight the truly brilliant ones. Scratch out the hamster-powered pickle robot (sorry, hamsters!). Now you’ve got a somewhat organized heap of inspiration. Congratulations! You've officially entered the realm of prototype potential!
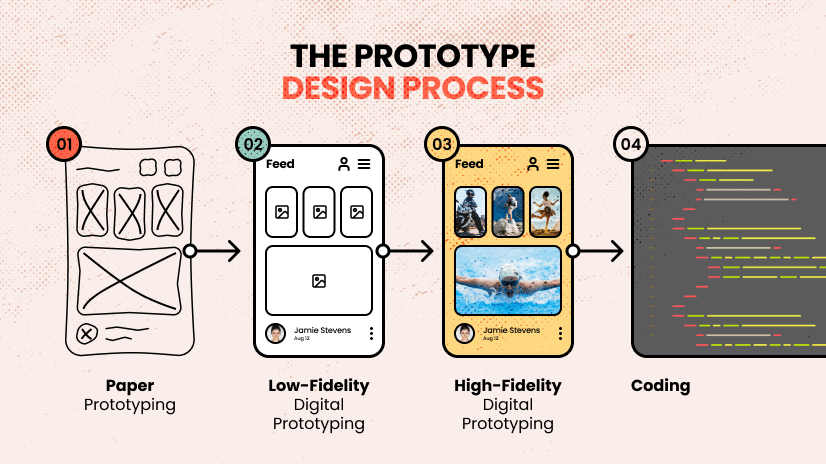
Step 2: Low-Fidelity Prototyping (aka Cardboard and Duct Tape: The Artist's Palette)
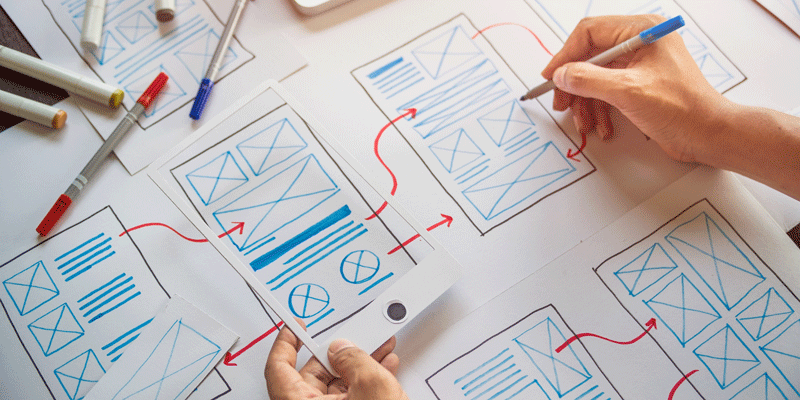
Okay, time to get your hands dirty! Forget fancy 3D printers (for now). We’re talking low-fidelity. Think cardboard, paper, pipe cleaners, Play-Doh, your grandma's old yarn collection – anything you can get your hands on. This is where you create a basic, super-rough representation of your product. Don’t worry about aesthetics. We’re aiming for function over fashion here. Think of it as the "before" picture in a makeover montage. The point is to get a tangible representation of your idea.
For example, if you're building a new kind of travel mug, duct tape a coffee cup to a juice box. Boom! Prototype! Now, get some *real* users (friends, family, that weird guy at the coffee shop) to interact with your masterpiece. Watch them struggle, observe their reactions, and listen to their feedback (even if it's "this looks like something a toddler made"). Remember, failure at this stage is a good thing! It means you're learning what doesn't work before you sink a ton of time and money into it.
Step 3: High-Fidelity Prototyping (aka Making it Look Almost Real)
Alright, you’ve survived the cardboard jungle. Time to level up! This is where you create a prototype that looks and feels more like the actual product. This could involve using more sophisticated materials (like actual plastic instead of, you know, potato chip bags), 3D printing, or even coding a basic version of your software. The goal is to get a realistic representation of your product's functionality and aesthetics.
Consider things like user interface (UI) and user experience (UX). Will people actually *enjoy* using your product? Is it intuitive? Does it make them feel a sense of joy and accomplishment, or does it just make them want to throw it out the window? These are important questions! This is also where you might start thinking about branding and marketing. What’s the story behind your product? What makes it unique? If your product were a superhero, what would its origin story be?
Step 4: Testing, Testing, 1, 2, 3 (aka Rinse and Repeat Until You're Crying)
Testing is crucial. I can't stress this enough. Get your prototype in front of as many people as possible. Observe how they use it, ask for feedback, and be prepared to iterate. This is where you'll uncover all sorts of unexpected problems and opportunities. Maybe your "ergonomic" handle is actually incredibly uncomfortable. Maybe your "revolutionary" new feature is completely useless. Don't take it personally! This is all part of the process.
Remember that pickle-opening robot? Turns out, people were more interested in a simple, easy-to-use jar opener than a complex, hamster-powered contraption. Who knew? The key is to be open to feedback and willing to change your design based on what you learn. Think of your prototype as a living, breathing thing that's constantly evolving.
Step 5: Launch (aka Please Don't Fail!)
Okay, you've iterated, tested, and refined your prototype to perfection (or at least, as close to perfection as humanly possible). Now it's time to launch! This could involve creating a crowdfunding campaign, pitching your product to investors, or even just selling it on Etsy. Whatever your strategy, be prepared to work hard and promote your product like crazy.
And remember, even if your product is a roaring success, the journey doesn't end there. You'll need to continue gathering feedback, improving your product, and adapting to changing market conditions. But hey, at least you’ve got a killer prototype under your belt. You’re on your way to world domination (or at least, pickle-opening mastery).
So, there you have it! Prototyping in a nutshell. Now go forth and create something amazing (and maybe a little bit weird). Just try to keep the hamster-powered pickle robots to a minimum.