Ever stared into your oven door and thought, "Is that... a Jackson Pollock painting made of grease?" We've all been there. That murky, brown film between the glass panes can seem like a culinary mystery. It's time to unveil the magic! Let's dive into the surprisingly fun task of cleaning your oven glass from the inside out.
The Quest Begins!
First things first, you'll need to locate the screws. They're usually hiding around the edges of the oven door. Think of it as a little scavenger hunt! Maybe even put on some adventurous music to set the mood. Once you spot them, grab your trusty screwdriver. It's tool time!
Now, unscrewing those screws can feel like unlocking a secret. Each turn brings you closer to that pristine, see-through dream. But remember, patience is key! Don't go all superhero and strip the screws. Slow and steady wins the race.
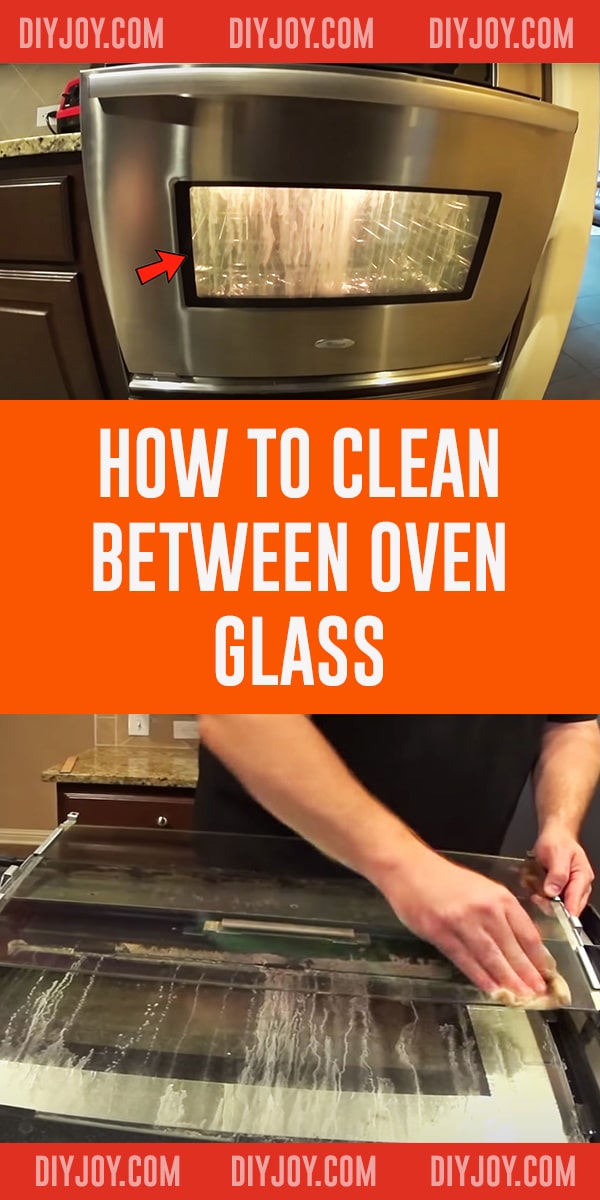
Carefully remove the inner glass panel. This is where the real fun begins! It's like opening a time capsule filled with the ghosts of dinners past. Be prepared for a bit of a shock – those splatters have stories to tell (mostly involving exploding sauces and rogue pizza toppings).
Confronting the Grime!
Armed with your favorite cleaner (we're partial to good old-fashioned baking soda paste), it's time to wage war on the grime. You can think of it as finger painting for adults, only with the goal of sparkling cleanliness instead of abstract art. Scrub-a-dub-dub!
Watch as the stubborn stains surrender to your cleaning prowess. It’s incredibly satisfying to see that gunk disappear. Each swipe reveals more and more of that glorious, clear glass. You're not just cleaning; you're revealing a masterpiece!
Don’t forget the corners! Those little crevices are notorious for hiding the most persistent grime. Grab a cotton swab or an old toothbrush to reach those tricky spots. Every nook and cranny deserves your attention. It is a challenge!
Rinse thoroughly! You wouldn't want any cleaning residue messing with your next culinary creation. Make sure all traces of cleaner are gone, leaving only sparkling glass behind.
Reassembly Time!
Now for the reverse scavenger hunt! Carefully place the inner glass panel back into its rightful place. Remember how it came apart? That's your guide! Think of it as a puzzle, but with better-looking results.
Screw those screws back in. Tighten them securely, but don't overdo it! You don't want to crack the glass or strip the screws. Just snug and secure will do the trick. You're so close!
Step back and admire your handiwork! That once-murky oven door is now a window to culinary heaven. You can finally see your cookies browning to perfection. It's a beautiful sight, isn't it?
Cleaning the oven glass might seem daunting, but it's surprisingly rewarding. You get to unleash your inner detective, conquer stubborn grime, and reveal a sparkling clean window into your cooking adventures. So, grab your screwdriver and get ready for some cleaning fun!
Plus, imagine the looks on your guests’ faces when they see that gleaming oven door. They'll think you're some kind of kitchen wizard. You will become a cleaning guru.
Remember, this isn't just about cleaning; it's about reclaiming your culinary view. It's about banishing the brown haze and embracing the beauty of a clear oven door. It's about proving that even the dirtiest jobs can be surprisingly satisfying.
So, what are you waiting for? Go forth and conquer that grimy oven glass! You might even find yourself enjoying the process. After all, who doesn't love a good cleaning adventure?
Now, if you'll excuse me, I have an oven door to admire. Seriously, it's mesmerizing.
Don't forget to look into using Mr. Muscle to get the oven sparkling! It is very efficient for removing tough grease stains. You will save lots of time and effort and have that sparkling oven glass looking brand new!
And remember, if you get stuck, there's always YouTube! The cleaning community is vast and helpful. There are lots of tips available for different brands of ovens! Have fun and good luck with your sparkling new oven glass.