Let's talk about bathroom plumbing. Specifically, the "rough in" stage. Now, I know what you're thinking: "Plumbing? Rough in? Sounds about as exciting as watching paint dry." But trust me, understanding this stuff can save you a world of headache (and a hefty plumber's bill) down the road.
Think of "rough in" as the skeleton of your bathroom plumbing. It's all the pipes behind the walls and under the floor that get installed *before* you slap on the drywall and pretty fixtures. It's the groundwork. It's like building the foundation of a house – nobody sees it when you're admiring the finished product, but without it, the whole thing collapses (or, in this case, floods!).
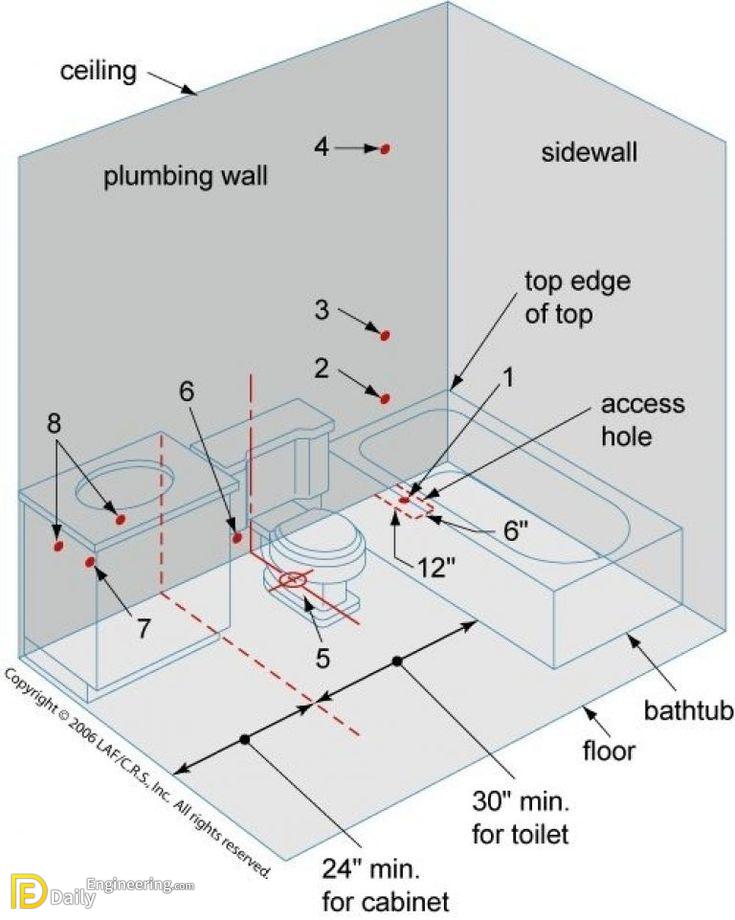
And where does a bathroom plumbing diagram come in? Well, that’s your treasure map! A detailed diagram shows exactly where each pipe goes, what size it is, and how it connects to everything else. It's the cheat sheet that keeps your plumber (or your very brave, DIY self) from accidentally turning your shower into a geyser aimed directly at your bedroom.
Why You Need a Diagram (Even If You Think You Don't)
Ever tried assembling furniture without the instructions? Yeah, that’s what tackling bathroom plumbing without a diagram is like. You might *think* you know where that weird little screw goes, but you'll probably end up with a wobbly table and a growing sense of frustration. A plumbing diagram is your Ikea instruction manual, but for pipes and water.
DIY Danger! If you're the type who likes to roll up your sleeves and tackle home improvement projects (more power to you!), a diagram is essential. It’s your guide to avoiding common mistakes, like accidentally connecting the hot water line to the toilet. (Trust me, nobody wants a surprise scalding every time they flush).
Future-Proofing Your Bathroom: A good diagram is also invaluable for future renovations. Want to add a bidet? Move the shower? Your diagram will show you where the existing pipes are located, making the job much easier and less likely to involve accidentally sawing through a water main. Imagine trying to find a stud behind drywall without a stud finder – it’s the same principle!
Deciphering the Secret Code (aka Reading the Diagram)
Okay, so you have a diagram. Now what? Don't panic if it looks like a bunch of squiggles and symbols. Most diagrams use standard symbols to represent different pipes and fixtures. A circle might be a sink, a rectangle could be a toilet, and different line thicknesses indicate pipe size. Some diagrams are even color-coded, which is like hitting the plumbing jackpot!
Key Things to Look For:
- Pipe Sizes: This is crucial. Using the wrong size pipe can restrict water flow or even cause leaks.
- Vent Pipes: These allow air to escape, preventing drain clogs. Ignoring these is like forgetting to poke holes in your potato before microwaving it – messy!
- Drain Lines: Make sure these have the proper slope so gravity can do its job and carry wastewater away.
- Water Supply Lines: These bring fresh water to your fixtures. Hot and cold lines should be clearly marked.
If the diagram looks completely foreign, don’t be afraid to consult with a professional. A plumber can walk you through the diagram and answer any questions you have. Think of it as hiring a translator for your plumbing hieroglyphics.
From Diagram to Reality
Once you understand the diagram, it's time to get to work (or, more likely, supervise your plumber while they get to work). The diagram will guide the placement of all the pipes and fittings. Make sure everything is installed according to code and that all connections are tight to prevent leaks. This is where accuracy is key. A slight deviation can lead to major problems down the line. It's like cutting a recipe in half – mess one ingredient up and the whole cake might crumble.
The Final Test: Before you close up the walls, it's always a good idea to pressure test the system. This involves filling the pipes with water and checking for leaks. It's better to find a leak now than after you've spent days tiling your shower!
So, there you have it: bathroom plumbing diagrams and the "rough in" process, demystified. It may not be the most glamorous topic, but understanding the basics can save you a lot of time, money, and soggy towels. Now go forth and conquer your plumbing projects (or at least understand what your plumber is doing)!